Windows servers use PKCS#12 – .pfx/.p12 files to contain the public key file (SSL Certificate) and its unique private key file. The Certificate Authority (CA) provides you with your SSL Certificate (public key file). You use your server to generate the associated private key file where the CSR was created.
You need both the public key and private keys for an SSL certificate to work properly on any system. Windows uses the pfx/p12 file to contain these two keys; therefore, if you need to transfer your SSL certificate from one server to another or store it someplace for safe keeping you need to create a .pfx/.p12 backup.
To backup, export, and move an SSL certificate from Windows IIS systems to Titan FTP perform the following steps.
Step 1: Create an MMC Snap-in for Managing Certificates on the IIS 7 system:
- Start > run > MMC.

- Go into the Console Tab > File > Add/Remove Snap-in.

- Click on Add > Click on Certificates and click on Add.

- Choose Computer Account > Next.

- Choose Local Computer > Finish.
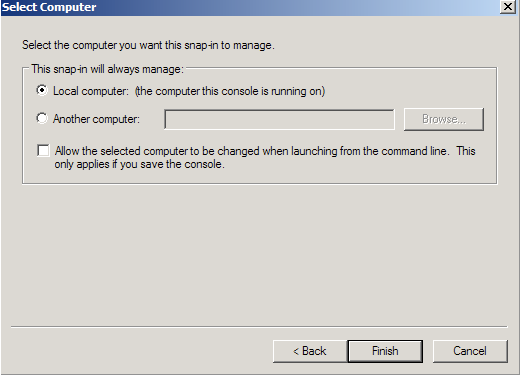
- Close the Add Standalone Snap-in window.
- Click on OK at the Add/Remove Snap-in window.
Step 2: Export/Backup certificate to .pfx file:
- In MMC Double click on Certificates (Local Computer) in the center window.
- Double click on the Personal folder, and then on Certificates.
- Right Click on the Certificate you would like to backup and choose > ALL TASKS > Export
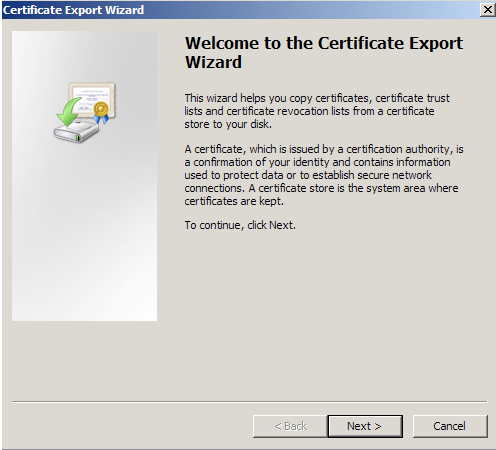
- Follow the Certificate Export Wizard to backup your certificate to a .pfx file.
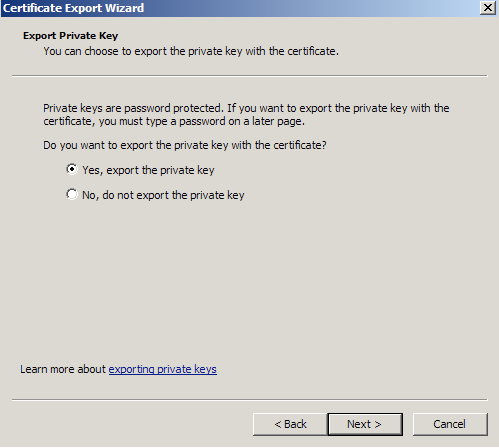
- Choose to ‘Yes, export the private key‘
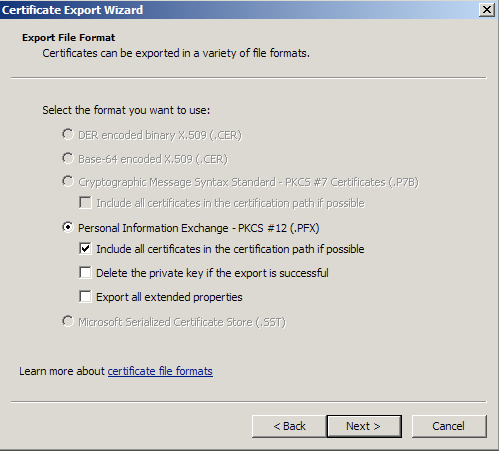
- Choose to “Include all certificates in certificate path if possible.” (do NOT select the delete Private Key option)
- Enter a password you will remember.
- Choose to save file on a set location.
- Click Finish.
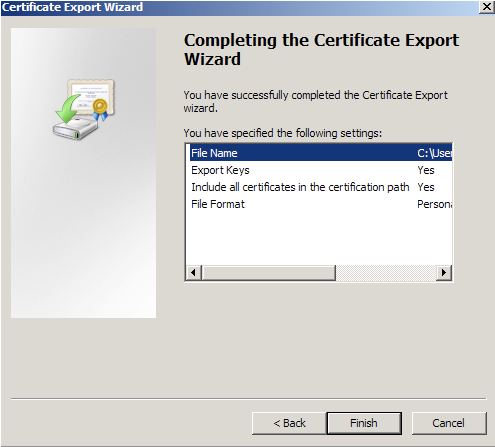
- You will receive a message > “The export was successful.” > Click OK.
- The .pfx file backup is now saved in the location you selected and is ready to be moved or stored for your safe keeping.
Step 3: Installing your PKCS#12 .pfx/.P12 file:
- Launch the Titan FTP Server Administrator.
- On the left pane expand to your respective domain and login.

- After Logging in navigate down and click Security.
- Click Certificate Management.

- In the Certificate Manage window click Import.

- On the Import Certificate windows click Import my Certificate and Private Key from a single PKCS#12.
- Under Filename click
 to specify to location and path of your SSL Certificate .pfx/.p12 file.
 - Under Enter a name used to identify this Certificate in the system, Specify a unique friendly name to define your SSL certificate and quickly identify it in the Titan system.
- Click Import.
Note: If prompted for a password you will use the one you specified when you exported your .pfx/.p12 file from the IIS system.

- Your SSL Certificate should now be imported into Titan.
Step 4: Assigning your SSL Certificate to its Domain Server:
- Back in Security under the Use the following certificate for this server drop down list , Select the Friendly Name for the SSL certificate you just installed.
- Under Enter the password associated with this certificate: Specify the password you have been using for your .pfx/p12 file.
- Under Certificate Store Folder click the
 and specify the location where Titan FTP stores all certificates for this server.
Note: Local paths and UNC shares are supported; do not use a mapped drive because mapped network drives are not accessible from the Titan FTP service. - Click Apply.

Congrats you have moved your SSL certificate and its private key from Apache and is now installed on your Titan FTP system.
If you are unable to use these instructions for your server, Acmetek recommends that you contact either the vendor of your software or the organization that supports it.