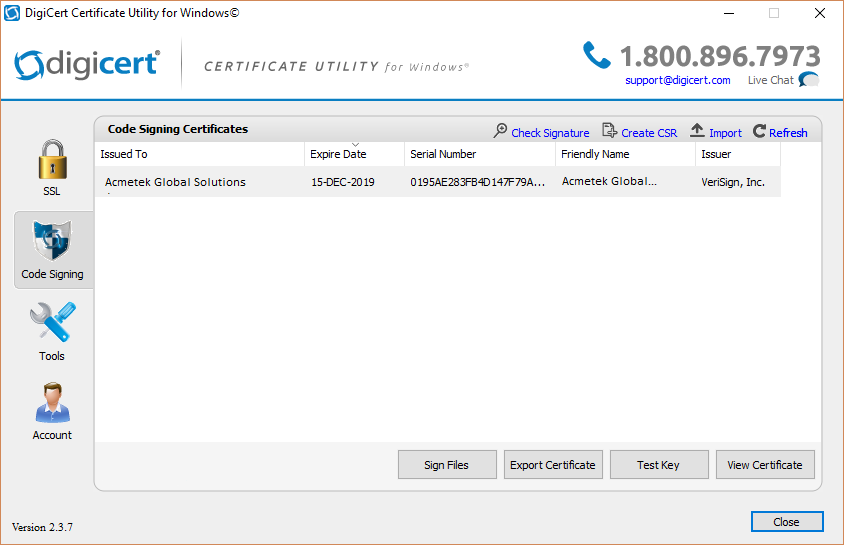
 The Digicert Certificate Utility is probably one of the best certificate encryption tool out on the net.
A lot of people become scared with key-pair encryption but key-pairs/certificates are actually fundamental easy to figure out. Unlike SSL certificates, code signing certificates perform the function of signing. Code signing certificates creates a tamper proof digital shrink wrap of your application software files and denotes to those who download or install the application who created/published it.
Although Some Certificate Authorities my separate their Code Signing Products and have different ways to Enroll and Install. The Digicert Certificate Utility is cross platform meaning your can signing the following files with the same certificate. .exe, .cab, .dll, .ocx, .msi, .xpi, .xap, windows kernel-mode. Java. jre and Adobe Air
- Sign or re-sign code or software
- Create a CSR from your system (optional)
- Sign applications with a single click
- Sign drivers and other system files
- Verify signed applications
- Time stamp applications
- Repair private key errors
- Automate application signing
Things to know:
- The Digicert Certificate Utility Code Signing Automatically refers to Microsoft user account certificate stores on the system. Some Certificate Authorities (CA) will use or request Internet Explorer for certificate enrollment and installation. Digicert will automatically pick up the certificate and import it into its code signing store if this is the case.
- If a CA requests you to use Firefox for enrollment and pickup of your code signing certificate you will then need to Export the certificate from the Firefox browser you used and then import it into the utility How to export certificate from Firefox.
- If you have a EV Code Signing Certificate that is installed on a token you must have the token plugged in when using the Digicert Certificate Utility.
Downloading and Installing The Digicert Certificate Utility.
- On your Windows server or workstation, download and save the Digicert Certificate Utility for Windows executable (DigiCertUtil.exe).
- Run the Digicert Certificate Utility for Windows by Double-click DigiCertUtil.
It’s that easy.
This Guide Includes The Following:
Importing Your Code Signing pfx/p12 Certificate
How To Code Sign Using The Digicert Certificate Utility
How to Check Your File or Any Applications Signature
How to Export Your Code Signing pfx Certificate with the Digicert Utility
How To Generate a CSR for Code Signing
How to Install Your New Code Signing Certificate Into The Digicert Certificate Utility
Importing Your Code Signing pfx/p12 Certificate:
Since the Digicert Certificate Utility refers to the windows user personal certificate store for code signing you can import your code signing pfx/p12 into the utility by performing the following.
Note: Importing your code signing certificate into the Digicert Certificate Utility code signing management pertains to non EV code signing certificates.
- Move a copy of your code signing certificate to the desktop workstation.
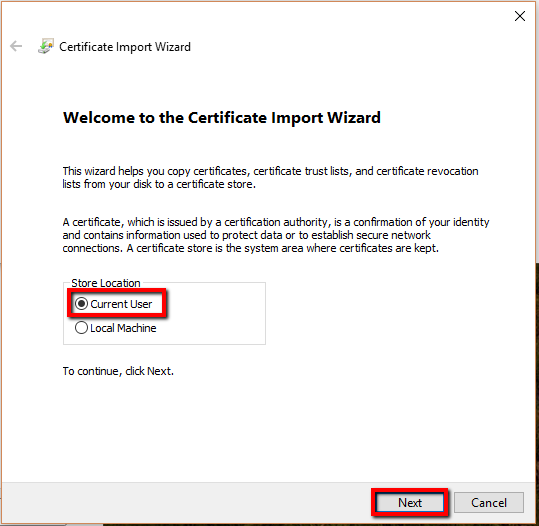
- Double click on your .pfx or .p12 code signing certificate file. This will bring up the Windows Certificate Import Wizard.
- Make sure that Current User is selected.
- Click Next.
- On the File to Import page, the location and path of your pfx/p12 certificate file should be specified otherwise click Browse… to specify the location and path of your certificate pfx/p12 code signing file.
- Click Next.

- On the Private key protection page, enter the password that you created when you exported your code signing certificate. Check Mark this key as exportable…
- Check Include all extended properties.
- Click Next.

- On the Certificate Store page, select Automatically Select the certificate store based on the type of certificate.
- Click Next.

- On the Completing the Certificate Import Wizard page, Review the details and then click finish.
- After importing your code signing certificate to the Certificate Store you should now be able to see your code signing certificate within the Digicert Certificate Utility.
- Run the Digicert Certificate Utility for Windows by Double-click the DigiCertUtil.exe
Note: If you already have had the certificate utility open then click Refresh to have it pop up.

Congrats you now have your code signing certificate imported into the Digicert Utility for easy code signing and management of your certificate.
Cross-Certificate for Kernal Signing:
If you plan on performing kernel signing you will need to import a special code signing Cross Certificate into your workstation. These Cross-Certificate are depending on what Certificate Authority you get your Certificate from. For a list on what Cross Signing certificates Microsoft see Microsoft’s article Cross-Certificate for Kernal Mode Code Signing.
More information on kernel signing can be found at Microsoft Dev Center Here.
How To Code Sign Using The Digicert Certificate Utility:
If you are using an EV code signing certificate plug in your token/device now.
- Run the Digicert Certificate Utility for Windows by Double-click DigiCertUtil.
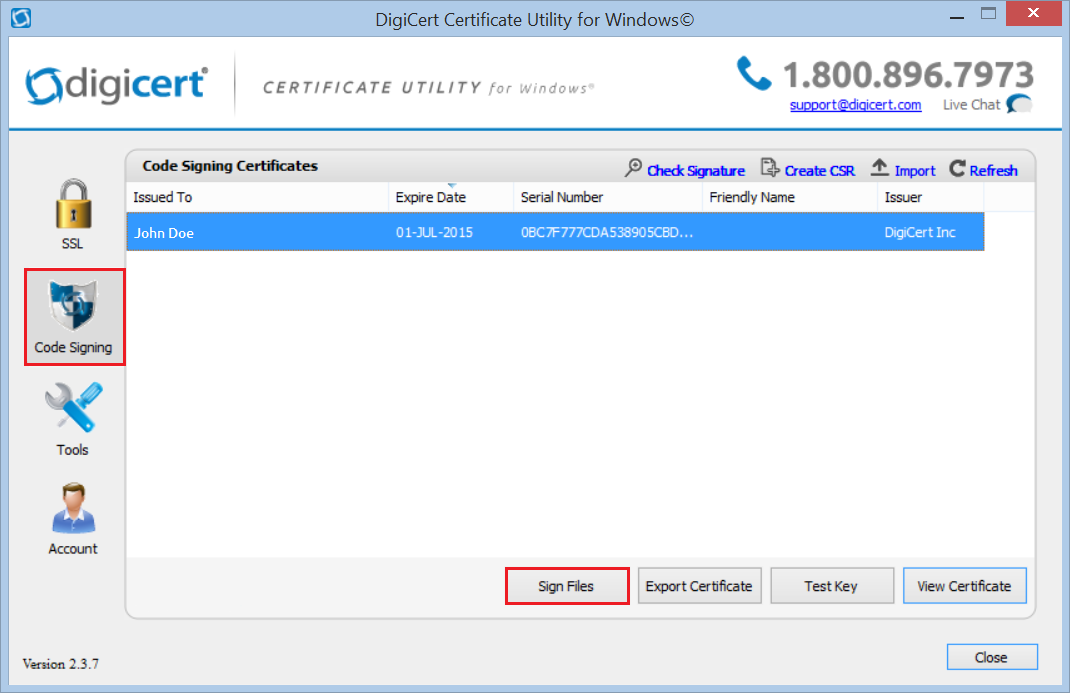
- Click Code Signing.
Note: If you do not see your EV code signing certificate (if applicable) plug it in now and hit Refresh. - Highlight the code signing certificate you want to use and click Sign Files.
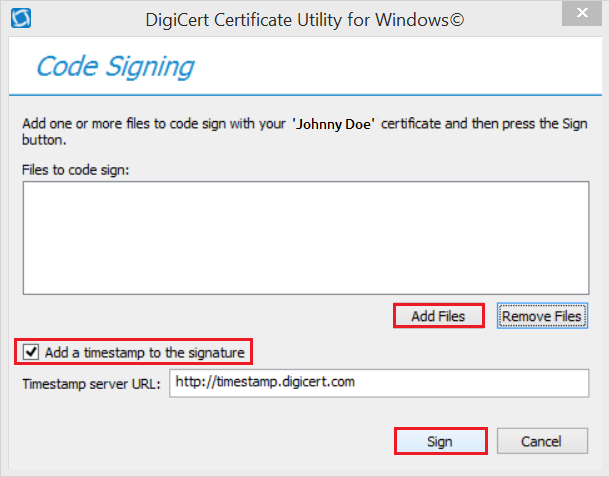
- In the Code Signing window, click Add Files to specify the location and path of the files you want to sign.
- Check Add a timestamp to the signature. If you want to add a time stamp to your signed application.
Note:- To add a timestamp, you must be connected to the internet, and have access through firewalls to make the call to the time stamping server you are using.
- It is recommended that you timestamp. This allows your signed applications to remain valid even after the code signing certificate has expired and the code remains untouched.
- Click Sign.
- you will get confirmation that all the files have been signed, click OK.
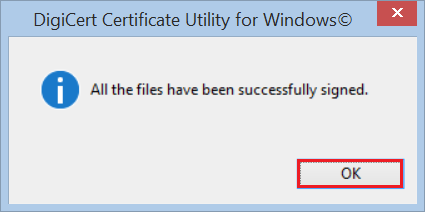
Congrats you have a now shrink wrapped your code and it is now ready to use.
How to Check Your File or Any Applications Signature:
- Run the Digicert Certificate Utility by Double-clicking the DigicertUtil.exe.
- In the Digicert Certificate Utility, Click Code Signing.
- Click Check Signature.
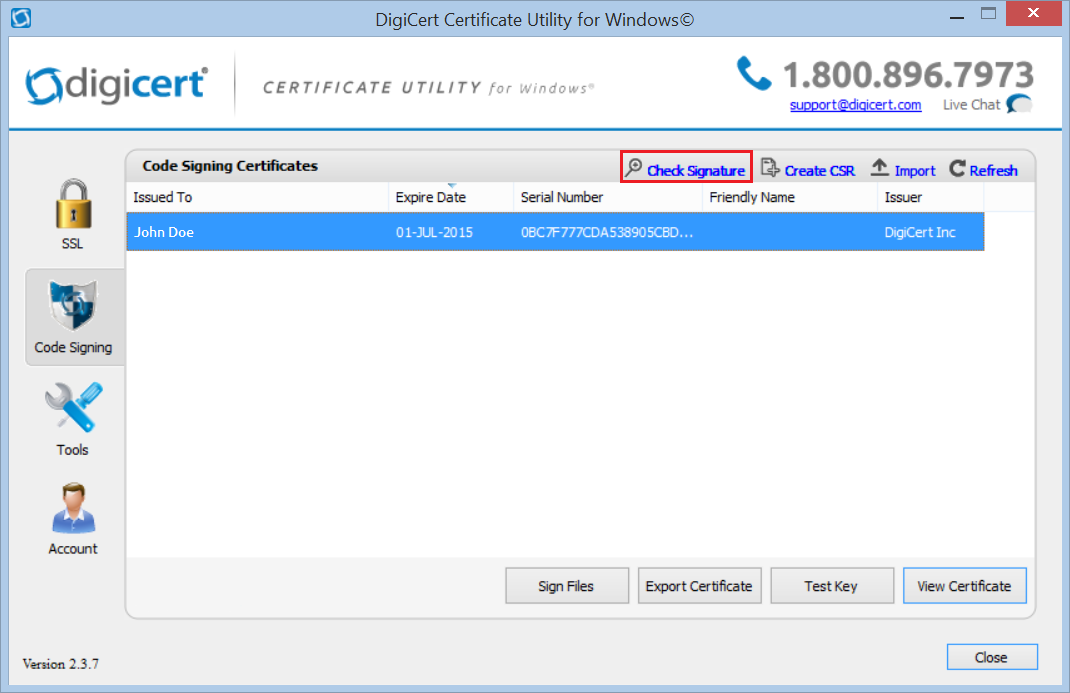
- Browse and open to the location and path of the signed application.
- In the Code Signed Signature Check window, you should see a green checkmark for “The file is signed and the signature was verified.”
- If the application was time stamped then, you should also see a green checkmark for “The signature was time stamped by ‘CA Name’ on ‘Date and Time'”
- If this application was signed for kernel driver purposes, the page will contain Kernel Mode Cross Certificate information.
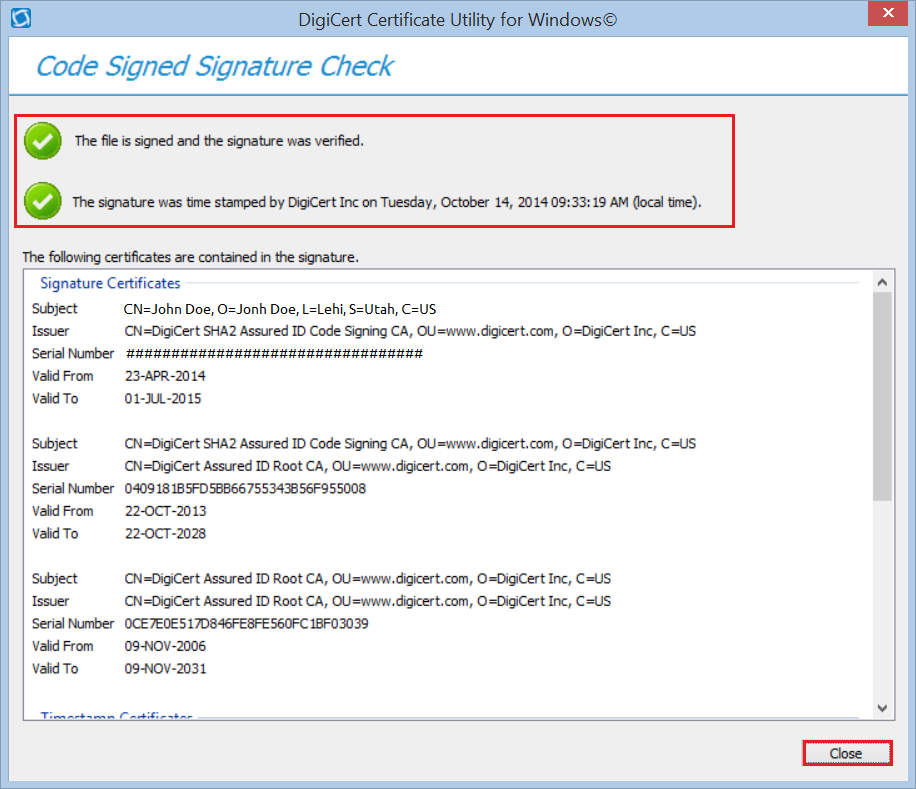
Congrats you have just easily checked to see if an application has been Signed.
How to Export Your Code Signing pfx Certificate with the Digicert Utility:
Depending on the circumstance you may need to export your code signing certificate to wherever else it is needed.
Note: Exporting your code signing certificate from the Digicert Certificate Utility pertains to standard non EV code signing certificates that have been imported into the Certificate Utility.
- Run the Digicert Certificate Utility by Double-clicking the DigicertUtil.exe.
- In the Digicert Certificate Utility, Click Code Signing.
- Select the certificate that you want to export and then click Export Certificate.

- In the Certificate Export wizard, select Yes, export the private key.
- Select PFX file
- Check Include all certificates in the certification path if possible.
- (Optional) If performing Kernal Signing, Check Include kernel mode driver signing certificate path.
Note: Depending on the format and whether or not a Cross-Certificate was originally imported into this system you may not see this option. Don’t worry about it if you are not Microsoft Kernal Mode Signing.
- Click Next.

- In the Password and Confirm Password fields enter and confirm a password you can remember.
Note: This password is required when you install your code signing certificate into any other system, or perform signing with certain applications. Do not forget it. If you do then you will have to re export the certificate and create a new password. - Click Next.
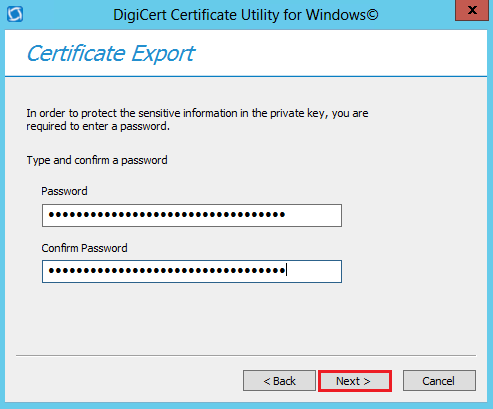
- Next to the File Name field click the … to browse to a location and path you want to save your .pfx file. Give it a name of your choice, click Save and then Finish when done.
- You will receive a message stating that the export was successful, click OK.
Congrats you have exported your certificate and are now able to distribute it as you see fit.
How To Generate a CSR for Code Signing:
To generate a CSR to get a Code Signing Certificate perform the following.
- Run the Digicert Certificate Utility by Double-clicking the DigicertUtil.exe.
- In the Digicert Certificate Utility, Click Code Signing.
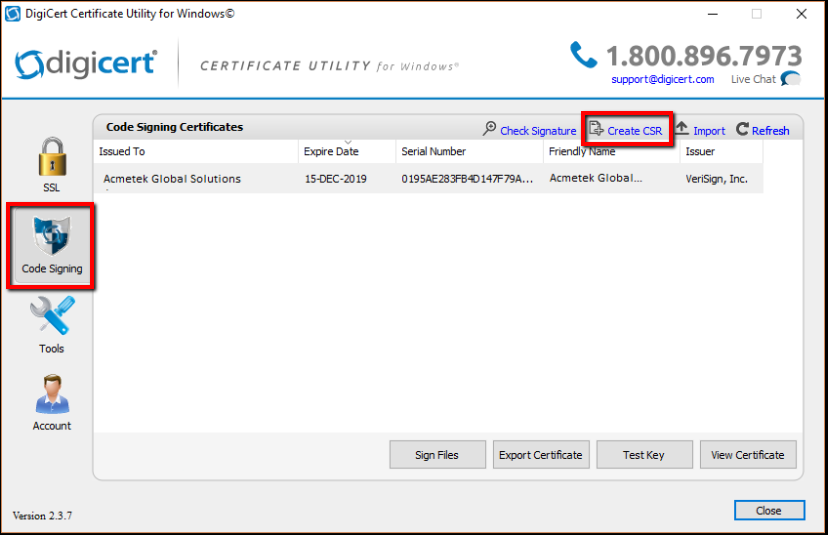
- Click Create CSR.
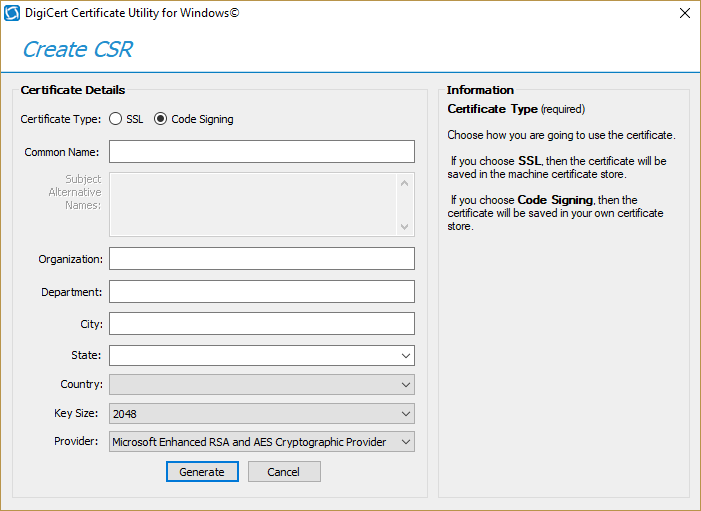
- In the Create CSR window under Certificate Type, select Code Signing.
- In the following Fields perform the following:
- Common Name: Enter the legal name of your Organization.
(Code signing certificates are issued to organizations names and not website like SSL) Example. Acmetek Global Solutions Inc. - Organization: Repeat the legal name of your organization again.
- Department (optional): Enter the sub team or organizational unit that this code signing certificate pertains to. Examples: Marketing, Mobile gaming, SSL Support Desk, Java code, etc..
- City: Legal corporate headquarters. Example Boston.
- State: Enter the state or province where your legal corporate headquarters is located.
Note: The state your organization is located in or if you’re creating a CSR for a location outside of the USA, you can enter anything into the list. It will accept any state name you type. - Country: From the drop down menu select the county.
- Keysize: Any will do. (Leave at default).
- Provider: Leave at default.
- Common Name: Enter the legal name of your Organization.
- When everything is filled and looking pretty click Generate.
- You will get another window that will display your Code Signing CSR request copy the text, including the —–BEGIN NEW CERTIFICATE REQUEST—– and —–END NEW CERTIFICATE REQUEST—– tags, and paste it into the your CA order form.
- When you are done, click Close.
Congrats you have just created you have just generate your CSR. During the enrollment of your Code Signing Certificate the CA should provide you with a field to paste this CSR into.
After the Code signing gets issued you will then Import your Code Signing Certificate back into the utility.
How to Install Your New Code Signing Certificate Into The Digicert Certificate Utility:
After you have enrolled for your Code Singing Certificate using a CSR generated from the utility you will then have to Import/Install the Code Signing Certificate after it gets issued. The CA should give you a pkxs7 format certificate also known as a .p7b. The way they give you this certificate will vary.
Save and move this .p7b file to the system where you have created the CSR using the Utility on.
To complete and install your Code Signing Certificate perform the following.
- Run the Digicert Certificate Utility by Double-clicking the DigicertUtil.exe.
- In the Digicert Certificate Utility, Click Code Signing.
- Click Import.
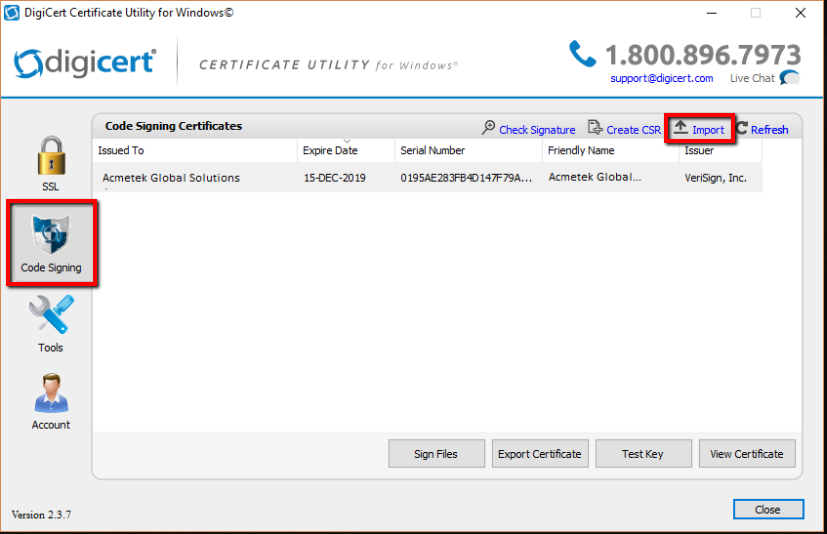
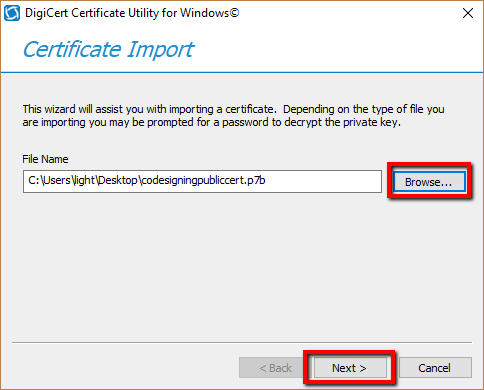
- In the Certificate Import window click Browse.. and Open to specify the location and path of your Code Signing certificate. Change the file type to either PKCS#7 Certificates (*.p7b) or All from the drop down to find your certificate.
- After specifying the location and path of the file click Next.
- You will see information about the certificate you have selected to import. In the Enter a new friendly name or you can accept the default field type a friendly name for the certificate. Something unique so that you can quickly identify this certificate.
- Click Finish.
- You should get confirmation that the certificate has been successfully install and see it within your list of code signing certificates.
Note: If you get an error that states “Private Key Missing” this is due to the following causes…- You did not create the CSR/Private key on this machine:
Resolutions:- Make sure you are on the correct system that has the Digicert Certificate Utility installed where you generated the CSR from.
- If you lost your private key or if the system where the CSR was generated using the Utility blew up then you will have to start from scratch by generating a new CSR, and performing a reissue/rekey of your code signing certificate.
- You are installing the a wrong certificate:
Resolutions:- Make sure you are installing the correct certificate. Typically once the certificate is on your desktop as a .p7b file you can double click on it to read the information. make sure the certificate or one of the certificates in its chain is issued to your organization with the correct dates.
- You did not create the CSR/Private key on this machine:
Congrats you have just installed your Code Signing Certificate using the Digicert Certificate Utility for Code Signing.
