Plesk 11.x systems are usually utilized by Hosting providers and the Plesk interface can vary. Below are generalized instructions. You may have to contact your hosting provider for specific instructions regarding certificate installation on their systems. Like all certificates you must first create a CSR public/private key pair. These two items are unique and cannot be separated. The CSR you will give to the CA for signing and the private key will be left on the system where the CSR was generated.
To generate a CSR on a Plesk 11.x system perform the following.
Step 1: Generating your CSR:
- Log into your Plesk application.
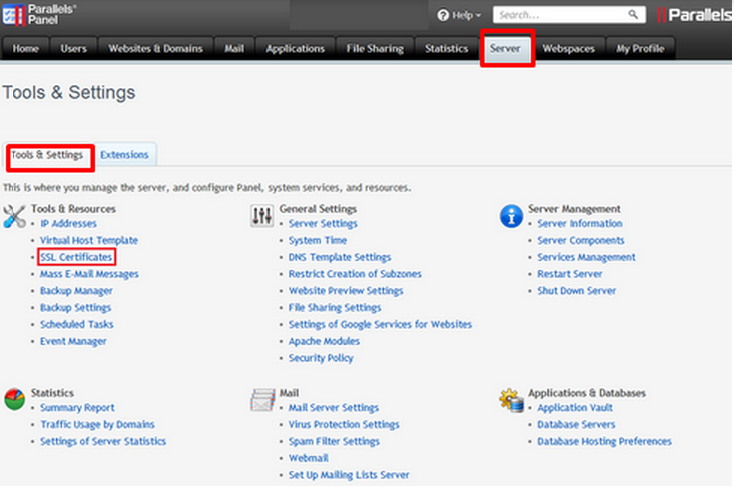
- Select the Server tab.
- Under the Tools and Setting tab click SSL Certificates.

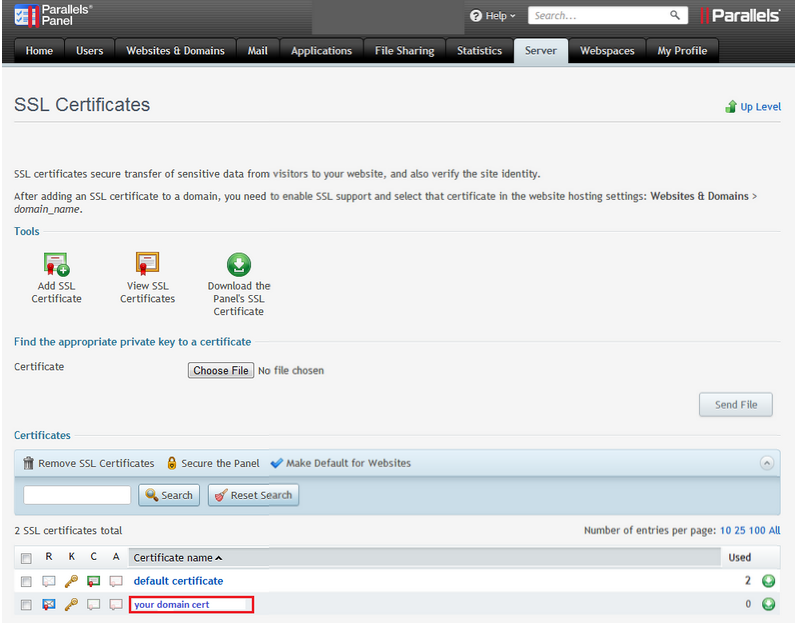
- Click Add SSL Certificate.

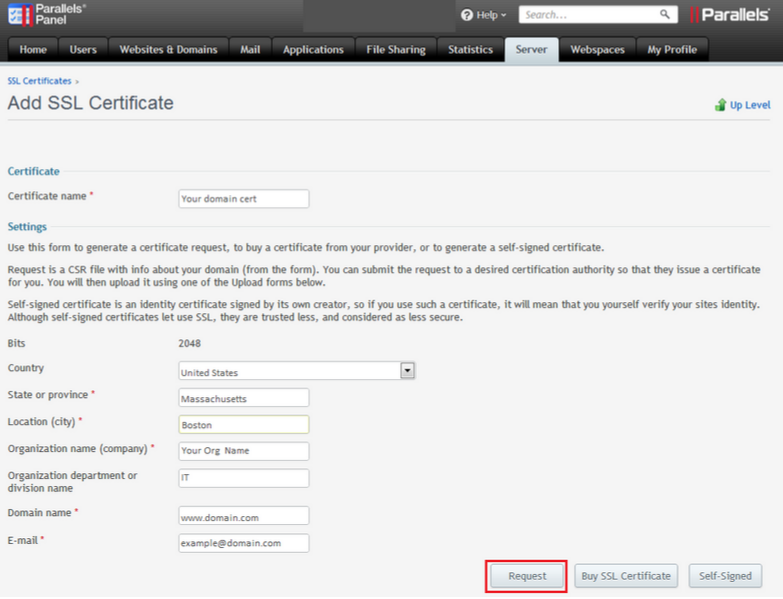
- Fill in the certificate details:
- Enter a Certificate Name.
- Select the Bit Size. 2048 or higher is required.
- Select the Country.
- Enter the State or Province. Do not abbreviate.
- Enter the Location. Do not abbreviate.
- Enter the legal Organization Name.
- Enter the Department.IT for example.
- Enter the Domain Name.
NOTE: For multi-domain Wildcard certificates, enter an asterisk (*) as the subdomain. For example, *.example.com. - Enter your Email Address.
- Click Request.

- Back in the SSL Certificates window. Click on your new Generated Certificate.

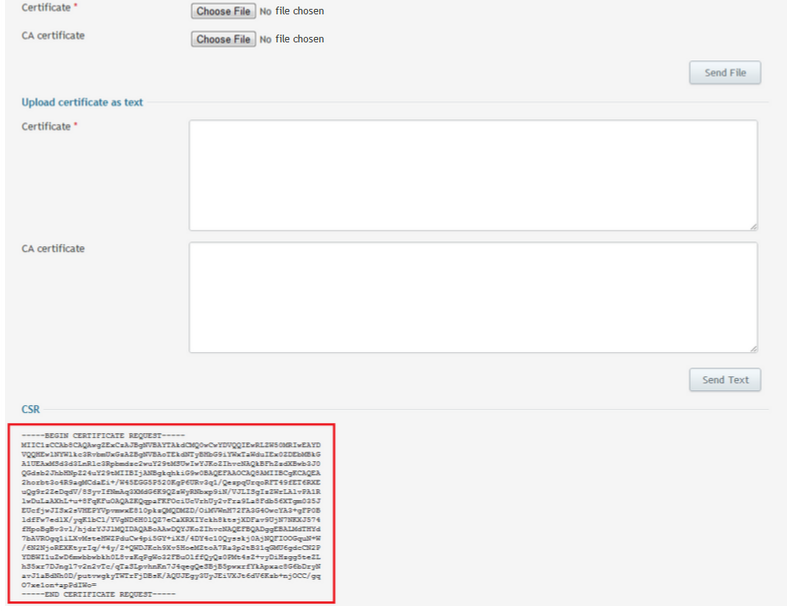
- A window will pop up with your CSR within the box.

Your CSR request has been created and is ready for you to copy and paste its contents into the enrollment portal.
Note: If your private key is also displayed in on the same pop up as your CSR make a copy of this in a .txt notepad for safe keeping. You will need this for installation purposes.
If you are unable to use these instructions for your server, Acmetek recommends that you contact either the vendor of your software or the hosting organization that supports it.