Checkpoint is a unique VPN gateway appliance. ![]() Typically CSR generation and SSL Installation are independent from one another, but Checkpoint desires to have both Root and Intermediate CA installed on the system before CSR generation can occur. So up front you will have to ask or consult your CA vender for these two certificate files before you generate your CSR for the enrollment of a SSL/TLS Certificate. Checkpoint is an apache based system so you will need x509/pem versions of your Root, Intermediate, and SSL Certificate.
Typically CSR generation and SSL Installation are independent from one another, but Checkpoint desires to have both Root and Intermediate CA installed on the system before CSR generation can occur. So up front you will have to ask or consult your CA vender for these two certificate files before you generate your CSR for the enrollment of a SSL/TLS Certificate. Checkpoint is an apache based system so you will need x509/pem versions of your Root, Intermediate, and SSL Certificate.
To prepare your Checkpoint VPN, Generate a CSR, and install your SSL Certificate on Checkpoint perform the steps below:
Step 1: Creating your Intermediate/Root CA certificates:
- Getting your Root and Intermediate CA will vary and you may have to consult your CA in order to get this. If you purchased your SSL certificate through Symantec, GeoTrust, Thawte, or RapidSSL click Here. It must be in its own Notepad file and saved with a .crt extension.
- Use a plain text editor such as Notepad, paste the contents of the copied certificate into the notepad, and specify the file with a naming convention of your choice with a .crt extension.
- If your intermediate CA certificate for your product is not in the body of the email you can access your Intermediate CA also in a link within that email. Copy and paste the contents of your Intermediate CA into its own Notepad file and save it with a .crt extension also.
Note: Some CAs may require two intermediates for best compatibility. These two are to be copied within their own corresponding .crt files and installed one at a time in a repeated process for intermediate installation.
Step 2: Installing your CA’s Root Certificate:
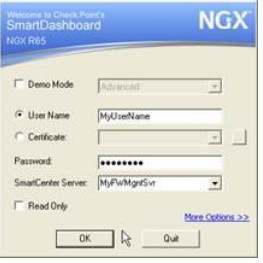
- Log in to SmartDashBoard.
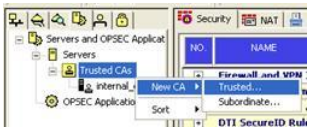
- From the Servers and OPSEC Application tab navigate to > Servers > Trusted CAs, select New CA click Trusted.
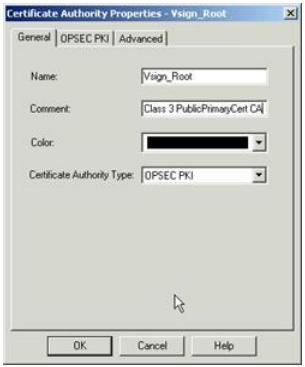
- In the Certificate Authority Properties pop up General tab in the Name and Comment fields. specify a name and comment of your choice.
- From the Certificate Authority Type drop down select OPSEC PKI.
- Click OK.
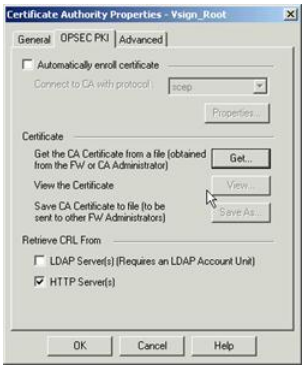
- Select the OPSEC PKI tab. Under Retrieve CRL From , insure that only Http Server(s) is selected.
- Under Certificate next to “Get the CA Certificate from a file (obtained from the FW or CA Administrator” click Get.
- In the Open window browse and open to the location and path of your Root .crt certificate file.
- A view of the imported certificate will appear.
- Click OK.
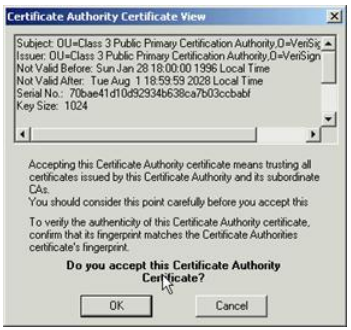
- The Root CA should now appear under the Trusted CAs.

Step 3: Importing your Intermediate CA:
Importing your Intermediate CA will be similar to importing the Root.
- From the Servers and OPSEC Application tab navigate to > Servers > Trusted CAs, select New CA click Trusted.

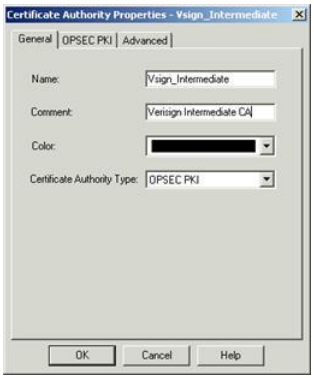
- In the Certificate Authority Properties pop up General tab in the Name and Comment fields. specify a name and comment of your choice.
- From the Certificate Authority Type drop down select OPSEC PKI.
- Select the OPSEC PKI tab and Under Certificate next to “Get the CA Certificate from a file (obtained from the FW or CA Administrator” click Get.
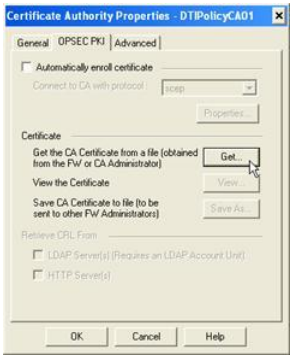
- In the Open window browse and open to the location and path of your Intermediate .crt certificate file.
- A view of the imported certificate will appear.
- Click OK.
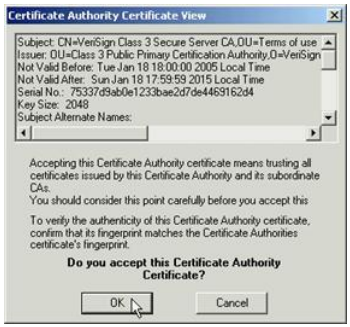
- You should now see both Root and Intermediate CAs

Step 4: CSR Generation:
Now that you have the trusted CA files for your SSL Certificate product on the system you can now generate your CSR.
- Under the Network Objects tab navigate to your CheckPoint gateway/cluster right click to select Edit…
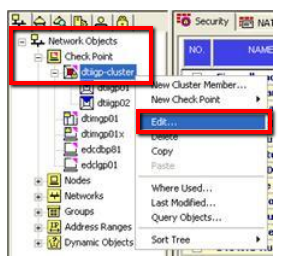
- In the Gateway Cluster Properties window Select VPN, and click Add.

- In the Certificate Properties window within the Certificate Nickname field specify a friendly name of your choosing/reference.
- From the CA to enroll from: drop down select the Intermediate CA (Not the Root) you imported in step 3 of these instructions.
The reason for this is that during SSL Installation the system will check to see if the SSL certificate was signed against this Intermediate CA for security purposes. - Click Generate…

- Click Yes in the warning that appears.

- In the Generate Certificate Request window within the DN field you will need to specify the following information as it applies to you in one long string separated by commas.
Note: If you are requesting a Wildcard certificate, add an asterisk (*) to the left of the CN where you want the wildcard, for example *.example.comCN=gatewayname.example.com, OU=IT Operations, O=Company Name, L=City, ST=State, C=US
Note Table:
- CN: The fully-qualified domain name, or URL, you’re securing. for example www.domain.com. If you are requesting a Wildcard certificate, add an asterisk (*) to the left of the common name where you want the wildcard, for example *.domain.com.
- OU: The Organizational Unit (OU) field is the name of the department or organization unit making the request. To skip the OU field, press Enter on the keyboard.
- O: If the company or department has an &, @, or any other symbol using the shift key in its name, the symbol must be spelled out or omitted, in order to enroll. Example: XY & Z Corporation would be XYZ Corporation or XY and Z Corporation.
- L: The Locality field is the city or town name, for example: Boston. Do not abbreviate. For example: Saint Louis, not St. Louis
- ST: Spell out the state completely; do not abbreviate the state or province name, for example: Massachusetts
- C: Use the two-letter code without punctuation for country, for example: US or CA in capitals.
- Click OK.
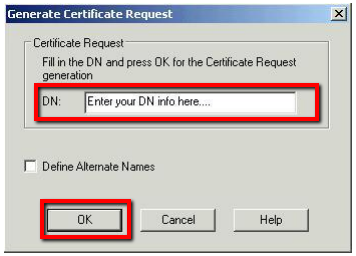
- Back in the Gateway Cluster Properties under VPN you should now see an extra certificate request under the NickName you provided.
- Click View to see the CSR Certificate Request.
- The CSR certificate request will have —– begin certificate request —— and ——end certificate request —— header and footers.
- You can now do either of the following:
- Click Save to File…:
This lets you save this to a text file to a location and name you desire. - Click Copy to Clipboard:
This will allow you to paste the CSR within the enrollment CSR field that a CA provides when enrolling for an SSL Certificate.
- Click Save to File…:
- Click OK.
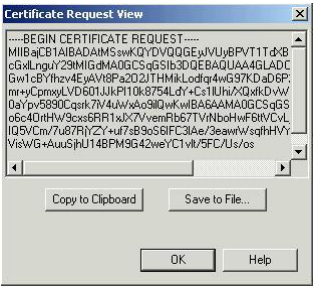
Your CSR request has been created from your Checkpoint system and is ready for you to copy and paste its contents into the enrollment portal. When enrolling you will want to get an x509/pem/cer type of certificate.
Step 5: Picking up your SSL Certificate:
- If you had the option of server type during enrollment and selected Other you will receive a x509/.cer/.crt/.pem version of your certificate within the email. Alternately you can access your Certificate User Portal by the supplied link in the email to pick up the x509 version of your certificate. Certificate pickup will vary between the Certificate Authorities.
- Copy the SSL certificate and make sure to copy the —–BEGIN CERTIFICATE—– and —–END CERTIFICATE—– header and footer. Ensure there are no white spaces, extra line breaks or additional characters.
- Use a plain text editor such as Notepad, paste the contents of the certificate, and save it with any name of your choice.
Step 6: Installing your SSL Certificate into Checkpoint:
- Under the Network Objects tab navigate to your CheckPoint gateway/cluster right click to select Edit…

- In the Gateway Cluster Properties window Select VPN select the certificate Nickname you used when generating your CSR request in Step 5 and click Complete…

- In the browse window pop up navigate to your SSL certificate and click Open.
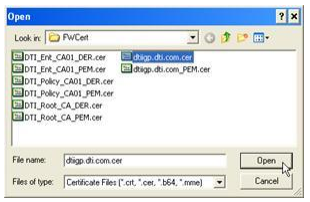
- Review the details of the certificate.
- Click OK.
Your SSL Certificate is now installed. When you click OK and install the policy, the SSL Certificate will be installed on the gateway.
If you are unable to use these instructions for your server, Acmetek recommends that you contact either the vendor of your software or the organization that supports it.
Checkpoint Support
For more information refer to Checkpoint


