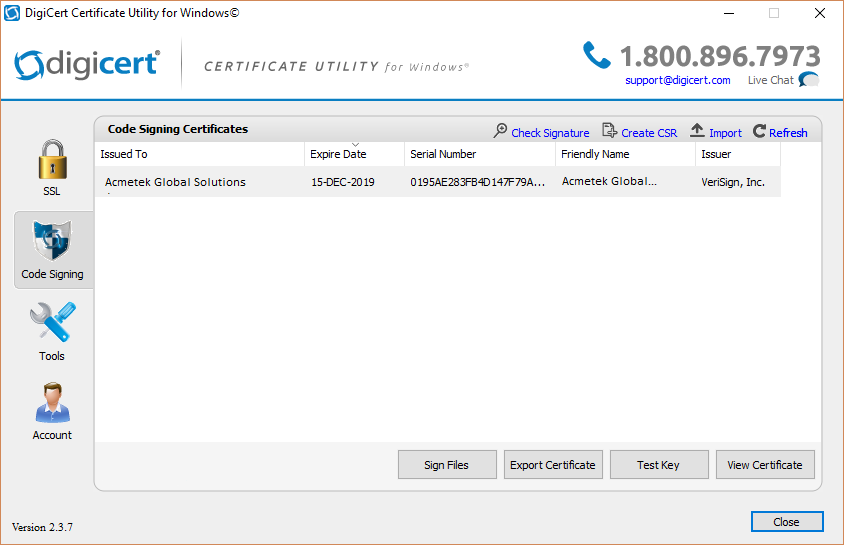
The Digicert Certificate Utility is probably one of the best certificate management tool out on the net.
A lot of people become scared with key-pair encryption but key-pairs/certificates are actually fundamental easy to figure out. Unlike SSL certificates, code signing certificates perform the function of signing. Code signing certificates creates a tamper proof digital shrink wrap of your application software files and denotes to those who download or install the application who created/published it.
Although Some Certificate Authorities my separate their Code Signing Products and have different ways to Enroll and Install. The Digicert Certificate Utility is cross platform meaning your can signing the following files with the same certificate. .exe, .cab, .dll, .ocx, .msi, .xpi, .xap, windows kernel-mode. Java. jre and Adobe Air
- Sign or re-sign code or software
- Create a CSR from your system (optional)
- Sign applications with a single click
- Sign drivers and other system files
- Verify signed applications
- Time stamp applications
- Repair private key errors
- Automate application signing
Things to know:
- The Digicert Certificate Utility Code Signing Automatically refers to Microsoft user account certificate stores on the system. Some Certificate Authorities (CA) will use or request Internet Explorer for certificate enrollment and installation. Digicert will automatically pick up the certificate and import it into its code signing store if this is the case.
- If a CA requests you to use Firefox for enrollment and pickup of your code signing certificate you will then need to Export the certificate from the Firefox browser you used and then import it into the utility for instructions on Exporting from Firefox see our article How to export certificate from Firefox.
- If you have a EV Code Signing Certificate that is installed on a token you must have the token plugged in when using the Digicert Certificate Utility.
For a comprehensive Guide to this tool Check our article Digicert Certificate Utility – Code Signing (Guide)
Downloading and Installing The Digicert Certificate Utility.
- On your Windows server or workstation, download and save the Digicert Certificate Utility for Windows executable (DigiCertUtil.exe).
- Run the Digicert Certificate Utility for Windows by Double-click DigiCertUtil.
Since the Digicert Certificate Utility refers to the Windows system user personal certificate store for code signing we are going under the assumption that your code signing certificate has already been installed/uploaded into the utility.
- If you have not do not see your code signing certificate within the utility then you will have to make sure you import your code signing pfx/p12 file by performing the following Digicert Certificate Utility – Code Signing (Importing a Code Signing pfx/p12 Certificate)
- If you used the utility to generate a CSR you will have to Install the code signing certificate after it has been issued by performing the following Digicert Certificate Utility – Code Signing (CSR Generation – Installation)
How To Code Sign Using The Digicert Certificate Utility:
If you are using an EV code signing certificate plug in your token/device now.
- On your Windows server or workstation, download and save the Digicert Certificate Utility for Windows executable (DigiCertUtil.exe).
- Run the Digicert Certificate Utility for Windows by Double-click DigiCertUtil.
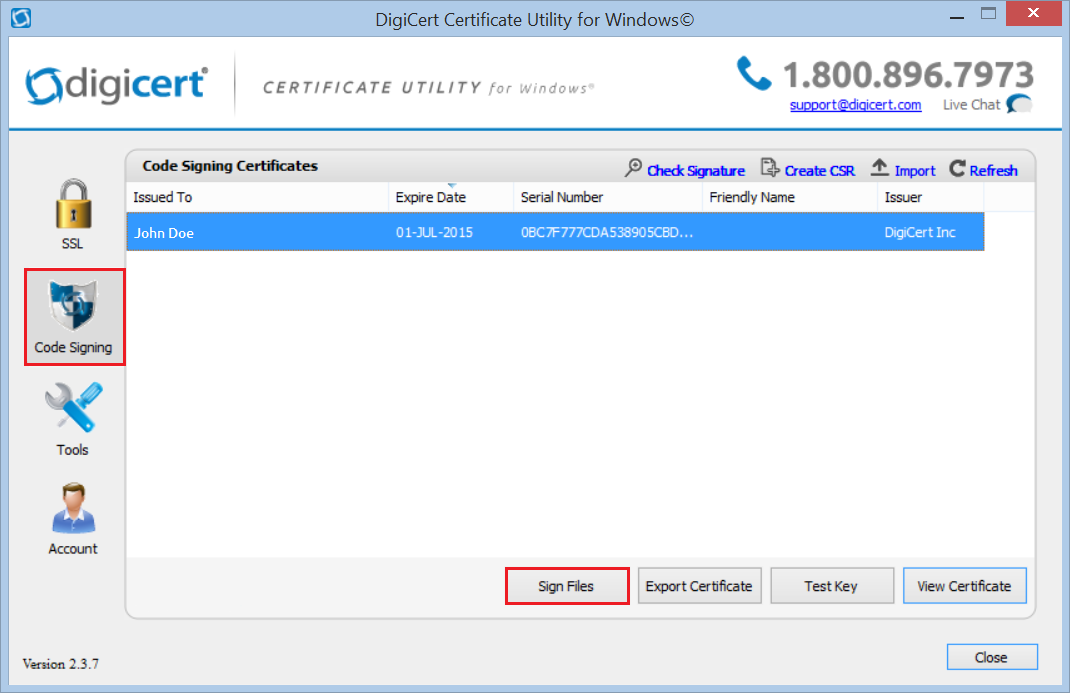
- Click Code Signing.
Note: If you do not see your EV code signing certificate (if applicable) plug it in now and hit Refresh. - Highlight the code signing certificate you want to use and click Sign Files.
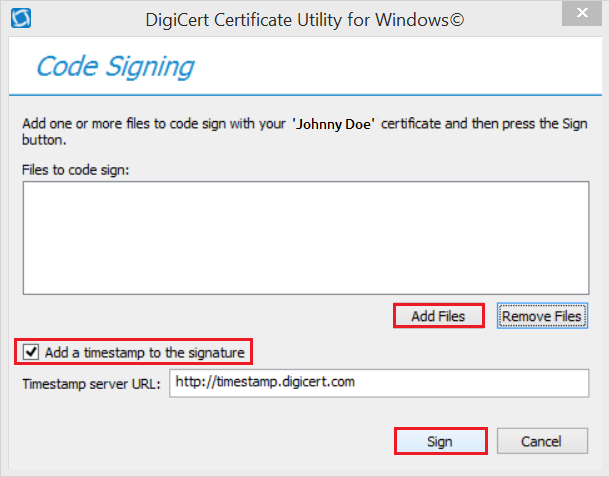
- In the Code Signing window, click Add Files to specify the location and path of the files you want to sign.
- Check Add a timestamp to the signature. If you want to add a time stamp to your signed application.
Note:- To add a timestamp, you must be connected to the internet, and have access through firewalls to make the call to the time stamping server you are using.
- It is recommended that you timestamp. This allows your signed applications to remain valid even after the code signing certificate has expired and the code remains untouched.
- Click Sign.
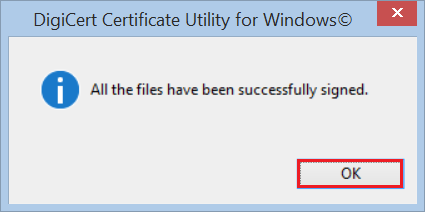
- You will get confirmation that all the files have been signed, click OK.
Congrats you have a now shrink wrapped your code. It is signed and it is now ready to use.
How to Check Your File or Any Applications Signature:
- In the Digicert Certificate Utility, Click Code Signing.
- Click Check Signature.
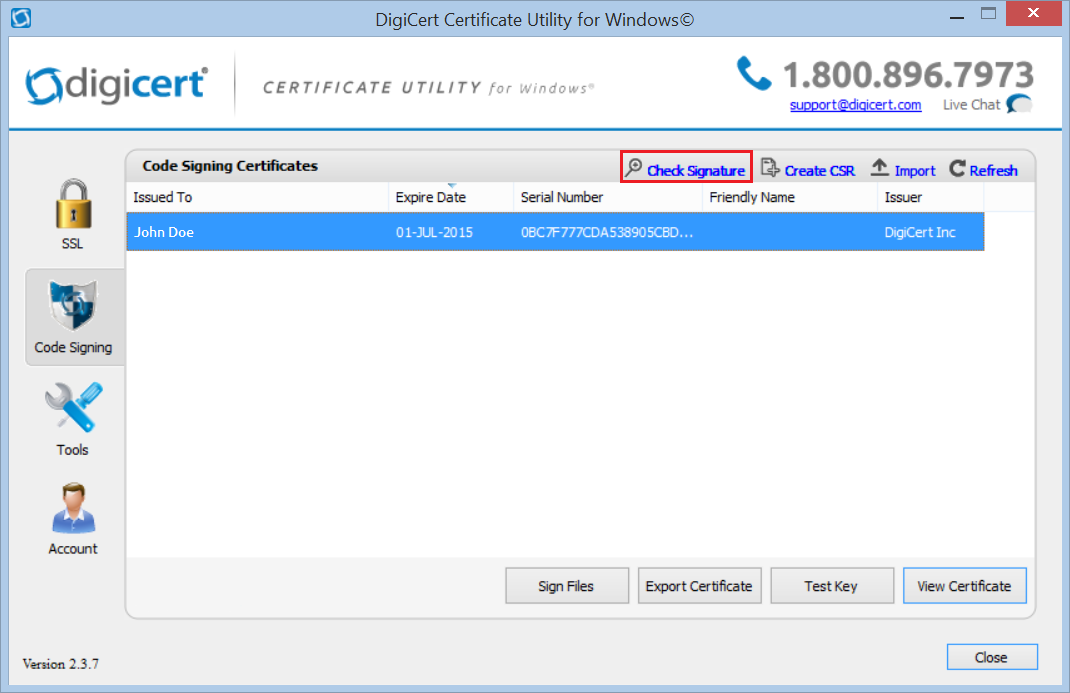
- Browse and open to the location and path of the signed application.
- In the Code Signed Signature Check window, you should see a green checkmark for “The file is signed and the signature was verified.”
- If the application was time stamped then, you should also see a green checkmark for “The signature was time stamped by ‘CA Name’ on ‘Date and Time'”
- If this application was signed for kernel driver purposes, the page will contain Kernel Mode Cross Certificate information.
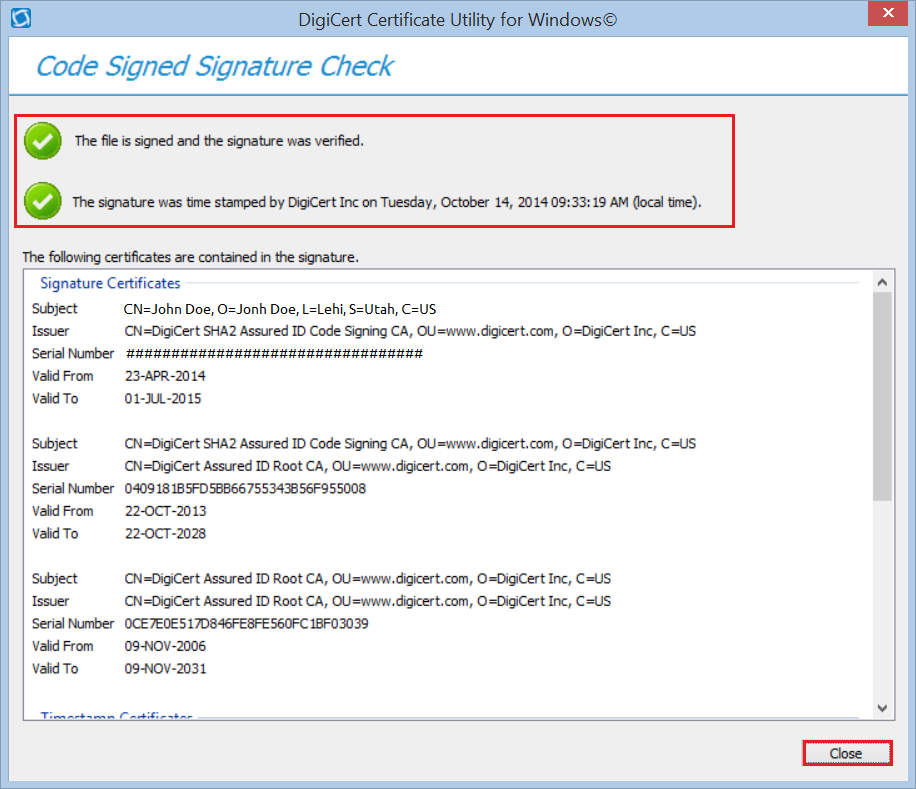
Congrats you have just easily checked to see if an application has been Signed.
