The Secure Remote Access Appliance comes with a self-signed certificate pre-installed. However, to effectively use your Secure Remote Access Appliance you should use a CA authorized SSL certificates.
This article will carry you through the following:
- Create Certificate Signing Request (CSR)
- Upload Certificate file and key
- Exporting certificate from beyond trust
- Deleting a certificate
1. Create a Certificate Signing Request (CSR):
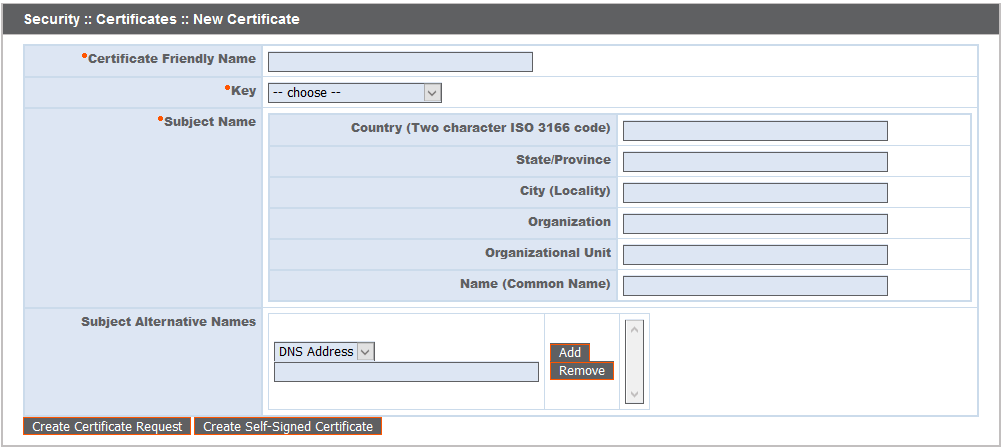
- Locate the Security: Other Certificates section and click Create.
- In Certificate Friendly Name, enter a name you will use to identify this certificate.
- From the Key dropdown, choose the Existing Key of your *.beyondtrustcloud.com certificate or select a new key of the required bit size.
- Enter the remaining information about your organization.
- In the Name (Common Name) field, enter a descriptive title for your BeyondTrust site.
- In the Subject Alternative Names section, enter your BeyondTrust site hostname and click Add. Add a SAN for each DNS name or IP address to be protected by this SSL certificate. SAN is optional.
- Click Create Certificate Request to create a certificate signing request (CSR).
2.Uploading Certificate file and key
- To upload certificates or private keys, click Import. Browse to the first file and upload it.

- Repeat the process for each certificate sent by your CA (Server, intermediate, and root certificate).
- If any of the intermediate certificates are missing, a warning appears beneath your new certificate.
“The certificate chain appears to be missing one or more certificate authorities”.
NOTE: It is always advisable to import the PFX file so that there will not get any private key missing errors. TO do this, create the CSR from windows IIS, install the certificate in the same IIS, and then export the certificate along with the key in pfx format.
3. Exporting certificate from beyond trust:
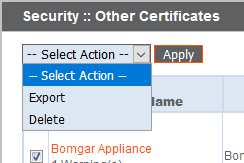
- To export one or more certificates, check the box for each desired certificate, select Export from the drop-down at the top of the table, and then click Apply.
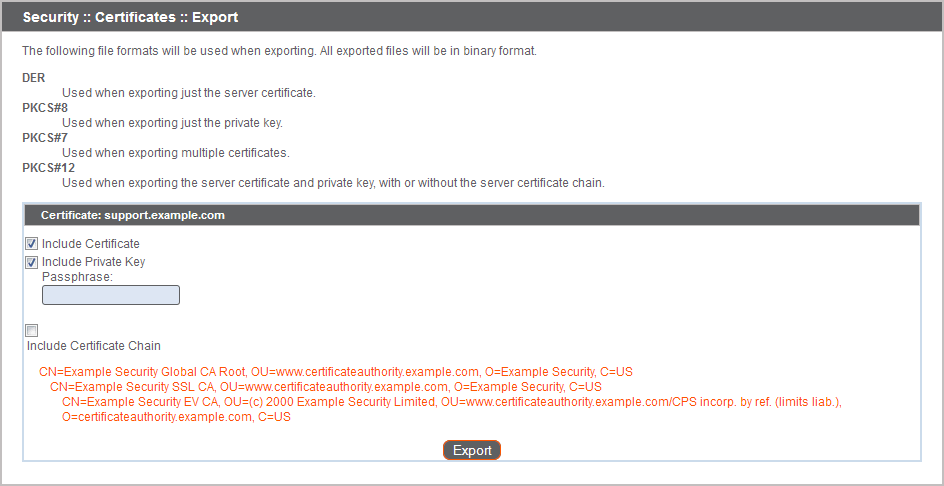
- If you are exporting only one certificate, you immediately can choose to include the certificate, the private key (optionally secured by a passphrase), and/or the certificate chain, depending upon each item’s availability. Click Export to start the download
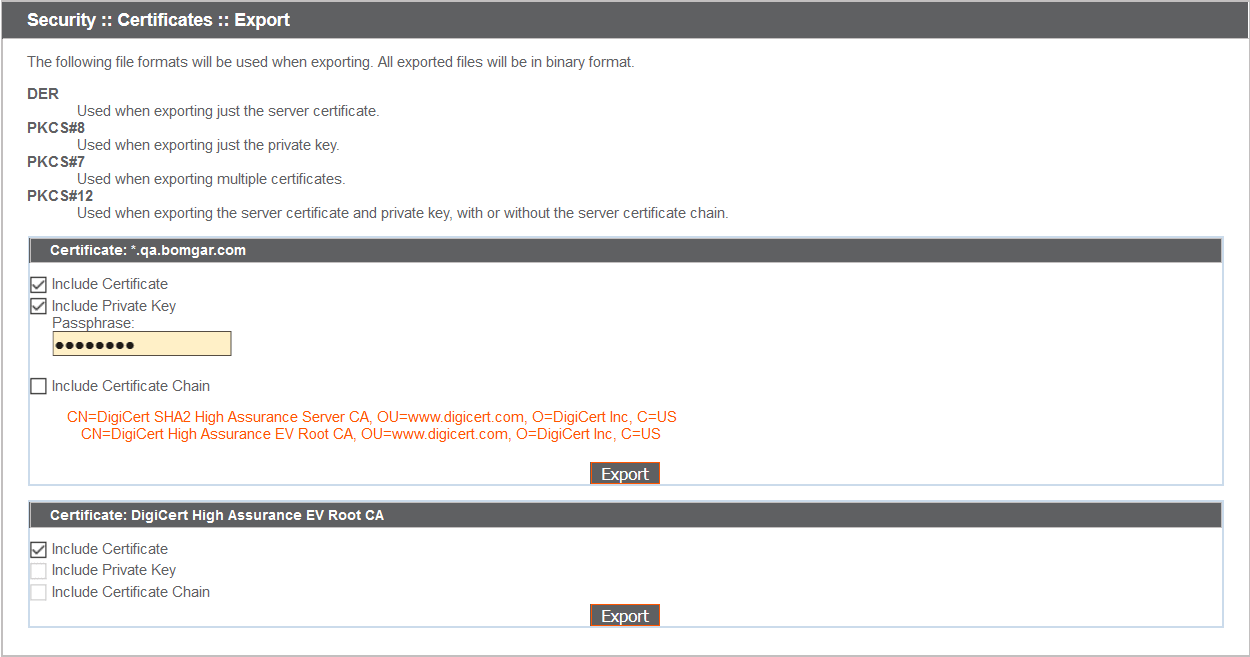
- If you are exporting multiple certificates, you will have the option to export each certificate individually or in a single PKCS#7 file.
- When selecting to export multiple certificates as one file, click Continue to start the download. With this option, only the actual certificate files will be exported, without any private keys or certificate chains.

- To include private keys and/or certificate chains in the export, select individual export and click Continue to view all selected certificates. For each listing, choose to include the certificate, the private key (optionally secured by a passphrase), and/or the certificate chain, depending upon each item’s availability. Click Export to start the download.
4.Deleting a certificate:
To delete one or more certificates, check the box for each desired certificate, select Delete from the drop-down at the top of the table, and then click Apply.

To confirm accuracy, review the certificates you wish to delete, and then click Delete.

Certificate Requests list:
Here we can view a table of pending requests for third-party-signed certificates. Click a certificate request name to view details.
To delete one or more certificate requests, check the box for each desired request, select Delete from the drop-down at the top of the table, and then click Apply.
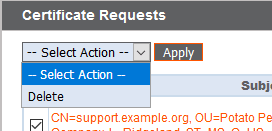
To confirm accuracy, review the certificate requests you wish to delete, and then click Delete.
We hope this article helped you with this easy process. If you are unable to use these instructions, Acmetek recommends that you contact either the vendor of your software or the hosting organization that supports it.


