Depending on the circumstance you may be getting mixed results of browser certificate trust or for whatever reason are experiencing an issue with Cross Root Certificates or warning of not fully trusting a chaining root. Cross Root Certificate where used back in the day by some Certificate Authorities to help certificate trust to older outdated server systems, but due to liability of allowing certificate trust to these systems that practice is no longer practiced. SSL Certificates are now used to modernize and update industry standards not give loop wholes around staying secure.
To bypass a Cross Root Certificate warning it is a matter of making sure a new updated root is installed on the system in question and that all purposes of that certificate is enabled. Majority of modern systems typically should be updated with newer roots and this odd 4 chain Cross Root certificate structure is rarely seen (modern secure structures have a 3 chain certificate hierarchy). Usually this issue appears in outdated systems like Windows Server 2003. If this is occurring in a more recent system like Windows Server 2008 then the system may have been configured/disabled to do this manually for whatever reason or it was oddly never updated with a newer modern root. Which happens on locked down systems due to security.
Windows systems will always show you the entire Certification Path of an SSL Certificate, and will automatically perform the shortest Channing path if possible with the certificates provided within its certificate stores. In this scenario we will be using Geotrust as an example.
To troubleshoot Root Certificate in a Windows System perform the following.
Step 1: Create an MMC Snap-in for Managing Certificates on a Windows server system:
- Start > run > MMC.

- Go into the Console Tab > File > Add/Remove Snap-in.

- Click on Add > Click on Certificates and click on Add.

- Choose Computer Account > Next.

Note: When troubleshooting browser certificates such as client certificates, email signing certificates, CodeSigning, etc.. or user systems you will choose My user account instead and continue with the certificate snap in wizard. - Choose Local Computer > Finish.
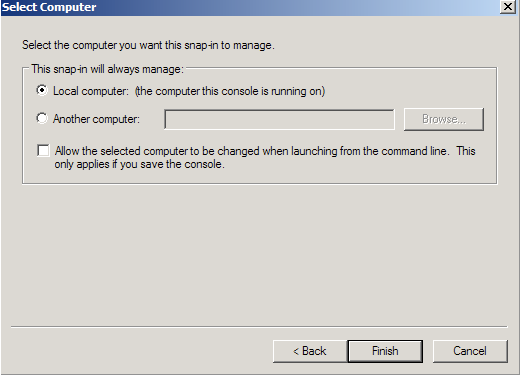
- Close the Add Standalone Snap-in window.
- Click on OK at the Add/Remove Snap-in window.
- You will be brought back into the management console where you will see your snap in where you can expand and right click the various folders or certificate so see options that are available to you.
You have successfully created an MMC snap in on your windows system to troubleshoot certificates.
Step 2: Checking to see if you have your Root within a MMC Root store:
Note: You may have to consult your certificate authority for which newer root should be enabled or imported if missing from the Microsoft Root stores in MMC. Roots for the Symantec, Geotrust, Thawte, and RapidSSL, can be gathered by visiting the following article: Root CA Certificates for Symantec, Geotrust, Thawte, RapidSSL
There are two Root Certificate Stores in Windows systems that will have to be looked at. Trusted Root Certification Authorities and Third Party Root Certificate Authorities. The process is the same for both.
- Expand Trust Root Certification Authorities.
- Click Certificates.
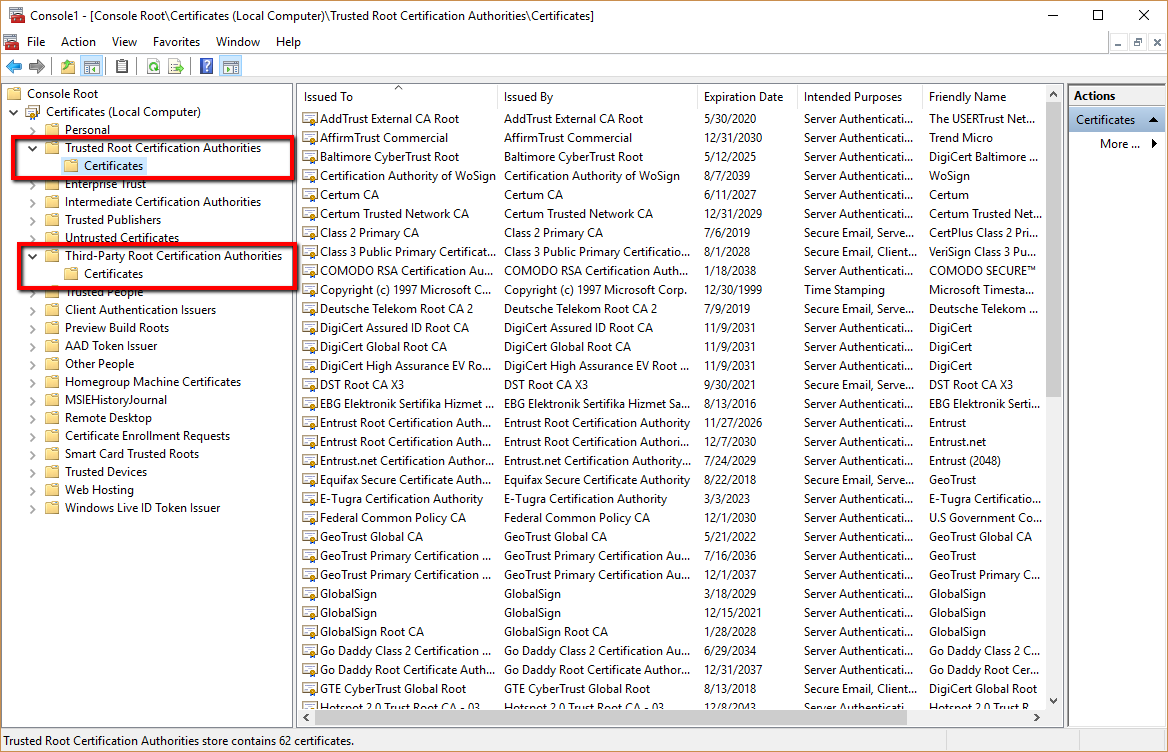
- Search for the Root designated by your certificate authority to be the newer modern root.
Since we are using Geotrust as an example we will be looking for a Certificate called Geotrust Primary Certification….. Its expires in 2036. - If you do not see the Root within Trusted Root Certification Authorities or Third Party Root Certificate Authorities then you will need to import that root into these stores.
- If you do see the root within the root stores then make sure that Enable All Purposes is enabled for the root certificate.
- You may have to do a combination of both. Below is Step 3a: Enabling All purposes of your Root certificate if root is found and Step 3b: Importing a Root Certificate into MMC Root store. They should help you out depending on what is needed.
Step 3a: Enabling All purposes of your Root certificate – if root is found:
- Right click on the root certificate if found.
- Click Properties.
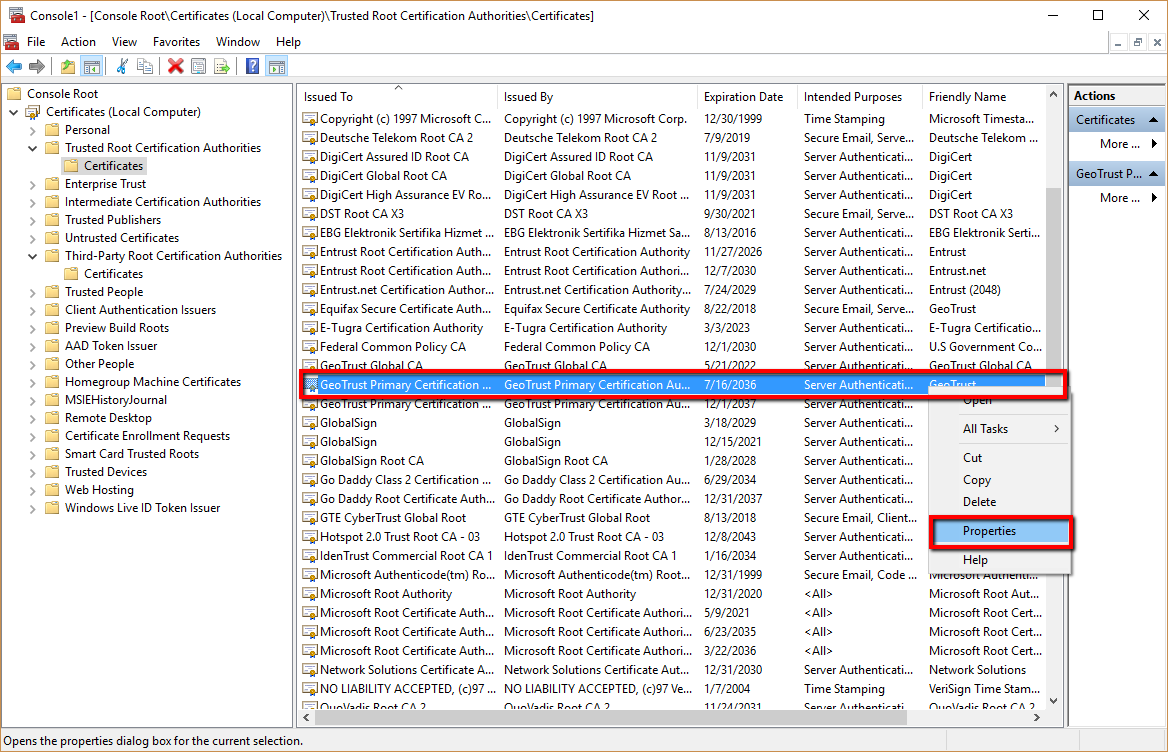
- In the certificate properties screen check Enable all purposes for this certificate.
- Click OK
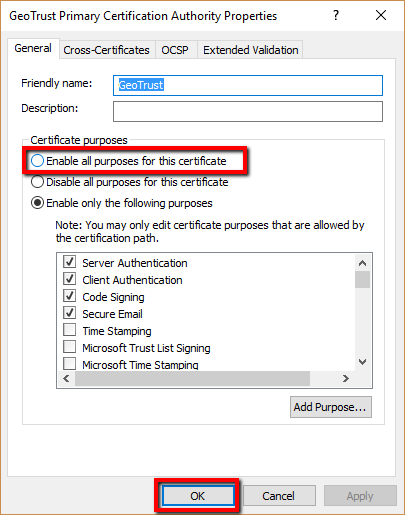
- Typically after this have been updated you will have to restart service so that the windows server can make the acknowledgment of the change.
Enabling all purposes of this certificate will shorten the chaining structure and should help trust a digital certificate trust applications, and browsers.
Step 3b: Importing a Root Certificate into MMC Root store:
Note: You may have to consult your certificate authority for which newer root should be enabled or imported if missing from the Microsoft Root stores in MMC. Roots for the Symantec, Geotrust, Thawte, and RapidSSL, can be gathered by visiting the following article: Root CA Certificates for Symantec, Geotrust, Thawte, RapidSSL
There are two Root Certificate Stores in Windows systems that will have to be looked at. Trusted Root Certification Authorities and Third Party Root Certificate Authorities. The process is the same for both.
To import a new root into your Windows system perform the following in MMC
- Expand Trust Root Certification Authorities.
- Right Click Certificates.

- Go to All Tasks > Import.
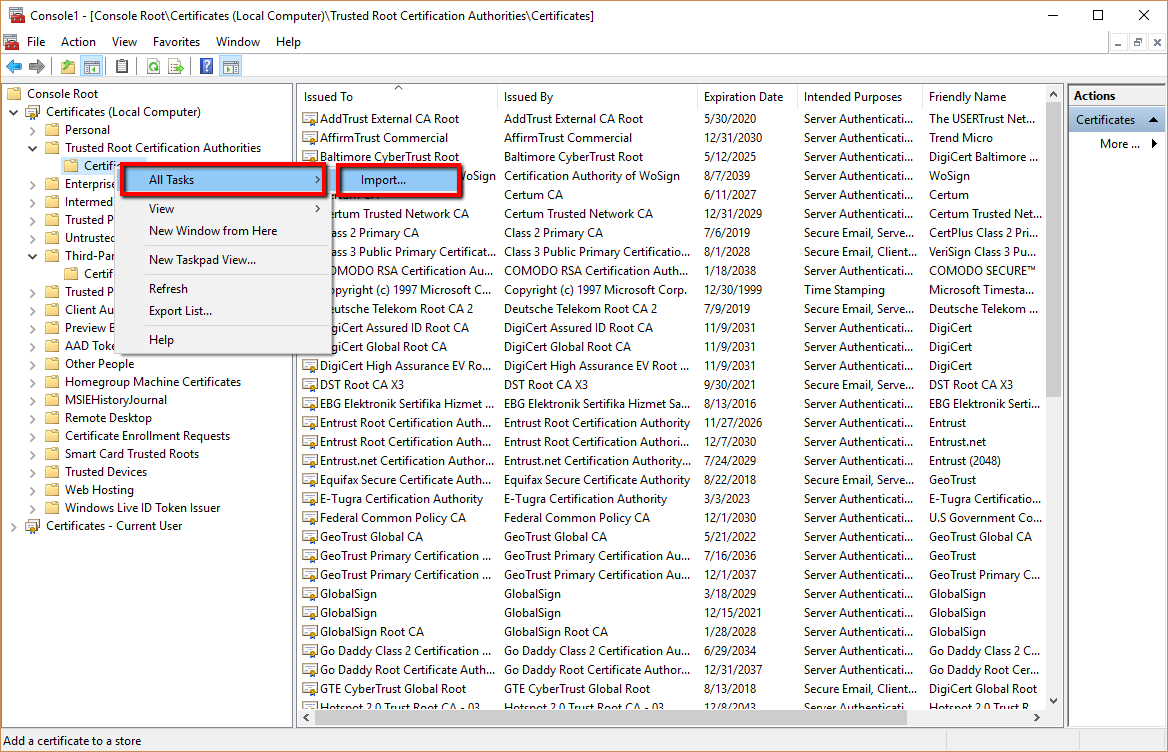
- In the Certificate Import Wizard click Next.

- Click Browse.
Specify and open to the location and path of your Root Certificate retrieved from your certificate authority. - Click Next.

- Click Next.

- Click Finish.
- you should get a message stating that the import is successful and should now see the Root Certificate within your certificate store.
You have just learned how to Import and Enable All Services of a Root Certificate within your Windows System.


