Windows servers use .pfx/.p12 files to contain the public key file (SSL Certificate) and its unique private key file. The Certificate Authority (CA) provides you with your SSL Certificate (public key file). You use your server to generate the associated private key file where the CSR was created.
You need both the public key and private keys for an SSL certificate to work properly on any system. Windows uses the pfx/p12 file to contain these two keys; therefore, if you need to transfer your SSL certificate from one server to another or store it someplace for safe keeping you need to create a .pfx backup.
To move you SSL certificate from a Windows IIS to Lync 2013 system with its private key perform the following steps.
Step 1: Create an MMC Snap-in for Managing Certificates:
- Start > run > MMC.

- Go into the Console Tab > File > Add/Remove Snap-in.

- Click on Add > Click on Certificates and click on Add.

- Choose Computer Account > Next.

- Choose Local Computer > Finish.
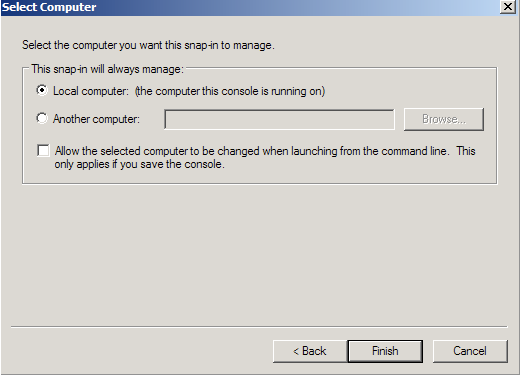
- Close the Add Standalone Snap-in window.
- Click on OK at the Add/Remove Snap-in window.
Step 2: Export/Backup certificate to .pfx file:
- In MMC Double click on Certificates (Local Computer) in the center window.
- Double click on the Personal folder, and then on Certificates.
- Right Click on the Certificate you would like to backup and choose > ALL TASKS > Export
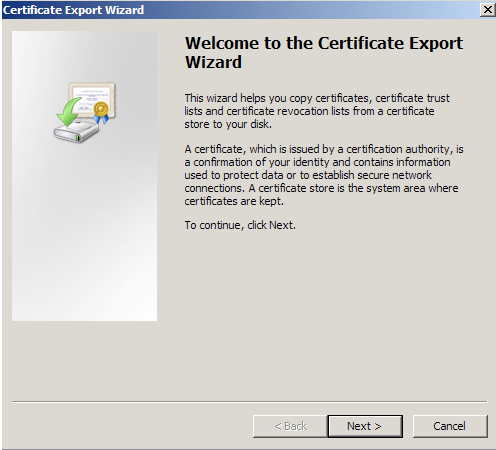
- Follow the Certificate Export Wizard to backup your certificate to a .pfx file.
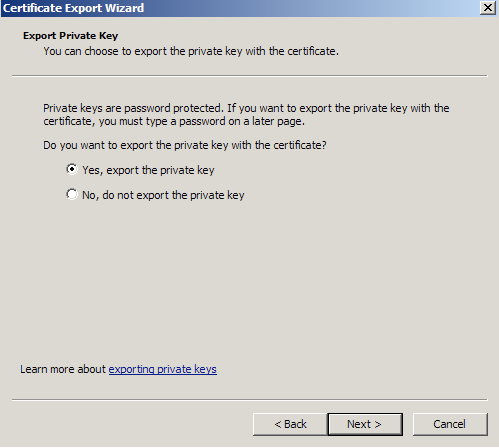
- Choose to ‘Yes, export the private key‘
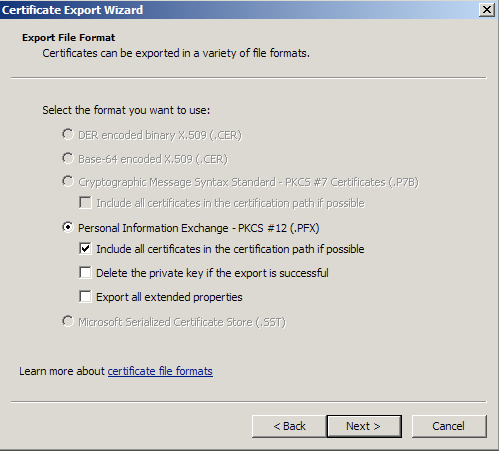
- Choose to “Include all certificates in certificate path if possible.” (do NOT select the delete Private Key option)
- Enter a password you will remember.
- Choose to save file on a set location.
- Click Finish.
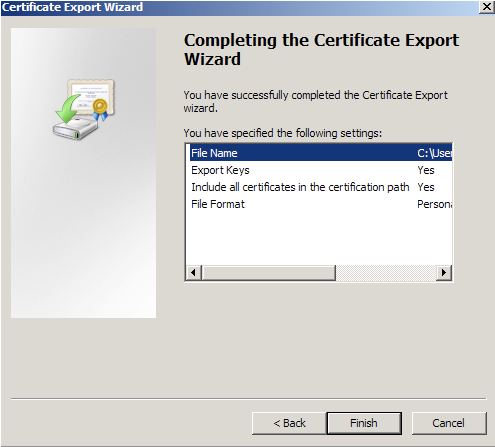
- You will receive a message > “The export was successful.” > Click OK.The .pfx file backup is now saved in the location you selected and is ready to be moved or stored for your safe keeping.You have successfully performed an Export a certificate from Windows IIS 7.0 – 8.5.
Step 3: Importing your .pfx file into Lync 2013:
- From the Windows start menu click Lync Deployment Wizard icon.

- Click Install or Update Lync Server System.

- Under the Request, Install or Assign Certificates section click Run Again.

- Choose External Edge certificate and click Import Certificate.

- Click Browse, Navigate to the file name and location of your SSL certificate you downloaded in Step 1.
- Check the box Certificate file contains certificate’s private key.
- Specify the Password used when you created your .pfx file.
- Click Next.
- On the Summary page verify the information is accurate and click Next.
- On the Executing Commands page ensure Task Status is completed, and click Finish.

- When returned to Certificate Wizard main page, Expand External Edge certificate Make sure all services are checked, then click Assign.
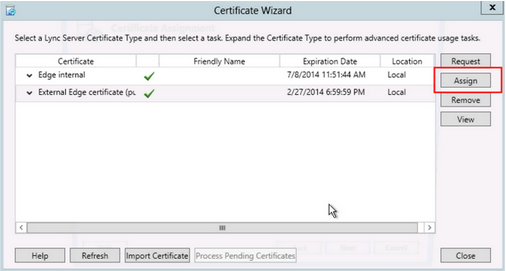
- Click Next.

- In Certificate Store click Next.
- On Executing Commands page ensure Task Status shows completed, then click Finish.
Your SSL certificate is now configured on your Lync 2013 server system.
If you are unable to use these instructions for your server, Acmetek recommends that you contact either the vendor of your software or the organization that supports it.


