Depending on the circumstance you may need to import a Microsoft Code Signing Certificate int o an alternate system/systems to perform signing of an office macro or a Visual Studio Application. Visual Studio refers to the same certificate stores as Internet Explorer (IE). So if you need to move a code signing certificate from one system to another Internet explorer will be used for the import of the certificate.
Certificate Authorities (CA’s) usually use either Firefox or Internet Explorer to generate Code Signing certificates during enrollment and pickup of the certificate. To being the process on moving your certificate from one system to another refer to the how to export instructions below. If Firefox was used for code signing certificate creation and pickup it will then need to be Export from Firefox then Imported into IE so Visual Studio can use it.
How to export a certificate from Internet Explorer.
How to export a certificate from Firefox.
We will assume now that you already have a certificate PKCS#12 (.pfx/.p12) file ready for import.
To Import your Code Signing Certificate Into IE/Visual Studio perform the following:
Step 1: Accessing the Windows IE Certificate store.
- In your Internet Explorer browser click on the gear
 in the upper right of the browser.
 - Click Internet Options.

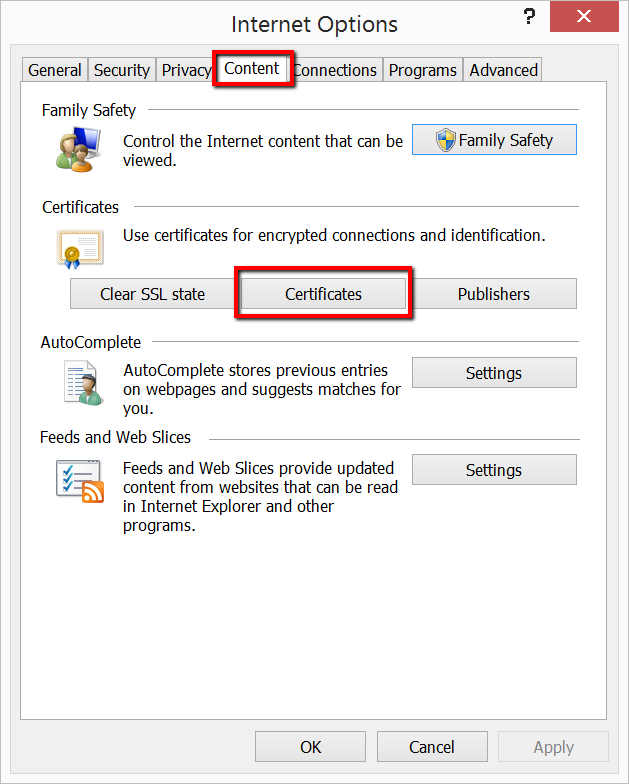
- Click the tab Content.
- Click Certificates.
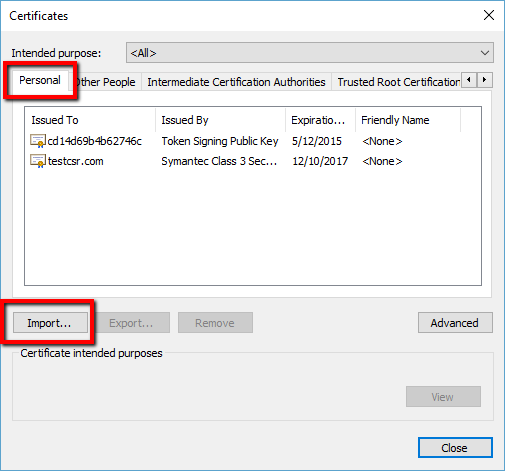
- Click the tab Personal.
- Click Import…
Step 2: The Certificate Import Wizard.
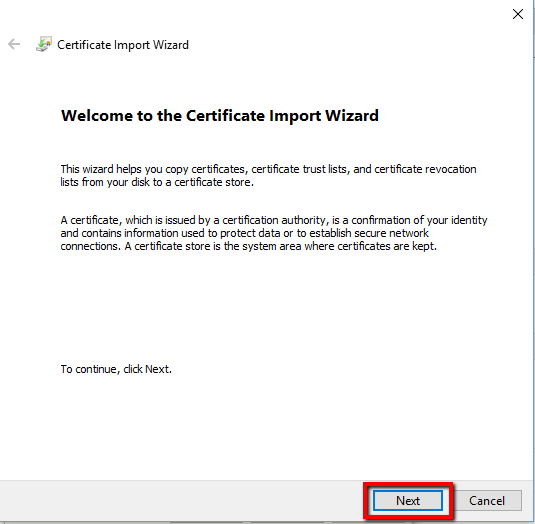
- In the Certificate Import Wizard click Next.
- Click Browse.
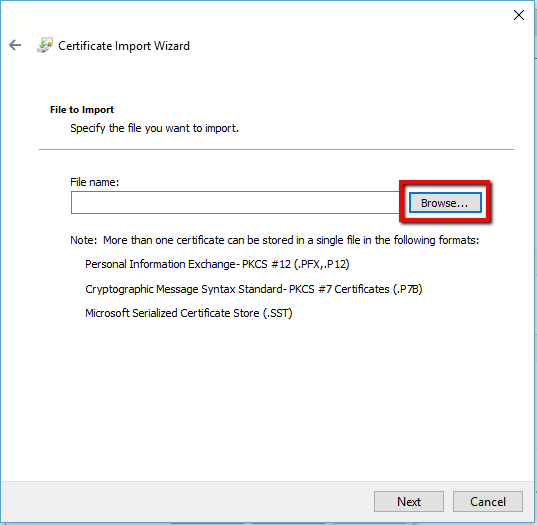
- In the windows explorer window browse to the location and path of your pfx/.p12 code signing certificate file. You will have to change the file type to search for in the drop down menu to Personal Information Exchange (*.pfx, *.p12)

- Once you navigated to the location/path and clicked your code signing certificate click Open.
- Click Next.
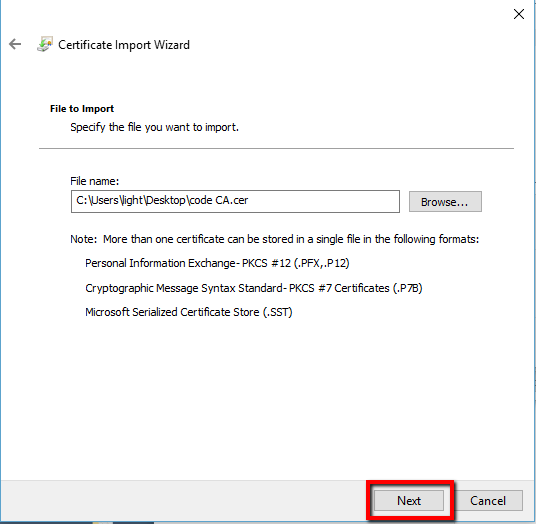
- Click Next.
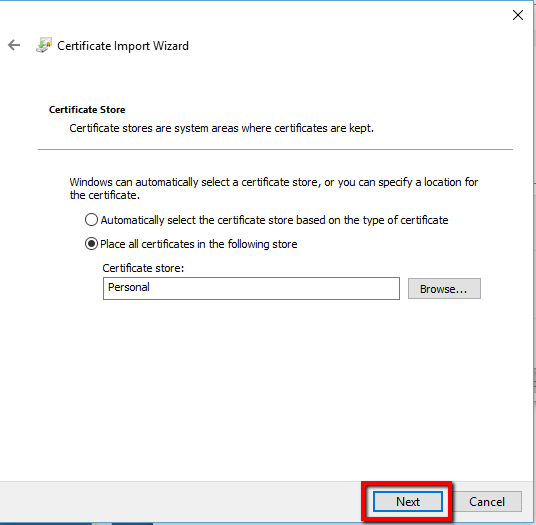
- Click Finish.
- Click Ok.
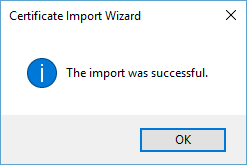
Grats! you have just imported your Code Signing Certificate into your system to be recognized by Visual Studio.
You can double check this by performing the following…
- With the project node selected in Solution Explorer, from the Project menu, click Properties (or right-click the project node in Solution Explorer, and click Properties).
- In the Project Designer, click the Signing tab.
- You should see your Code Signing CA issued certificate as a option.
For more information on Visual Studio and Code Signing visit Microsoft Support


