Digital signatures identify/authenticate you as the document signer and allow document recipients to verify that no one has modified the contents of the document since you signed it. Signing, Encrypting and reading will vary depending on the applications that are involved.
A Digital ID certificate is required to create a digital signature. The most secure Digital ID are issued by a trusted Certificate Authority. Some of these Digital ID’s are on tokens and other are files that are imported into trust stores on your system or application. On Windows operating systems the majority of these applications refer to the User trust stores.
Note: Majority of the time Firefox is used to generate Digital ID Certificates Firefox, but Firefox does not use the same trust stores as Windows operating Systems. If Firefox was used to generate or pickup your Digital ID you will have to export it from your Firefox browser, see our article How To Export A Certificate from Firefox?
Digital ID Files generally have a PFX or P12 extension and contain the public key file (certificate) and the associated private key file. We will assume that you already have a PFX or P12 Digital ID or Email (S/MIME) Certificate file and it has been moved to or already resides on your Windows system in question.
To import a Digital ID Certificate into your Windows system perform the following.
Step 1: The Certificate Import Wizard:
- With your PFX/P12 file on your windows system, double left click the certificate file.

- In the Certificate Import Wizard pop up window click Next.
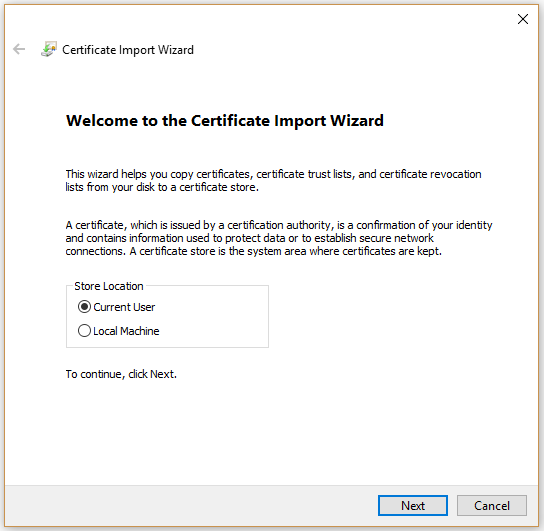
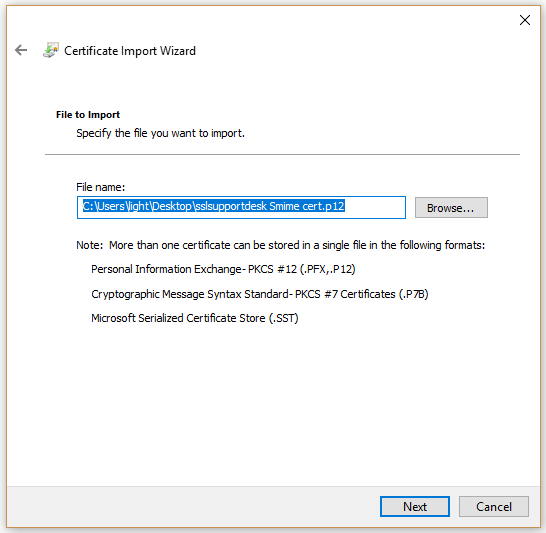
Since you double clicked on the certificate the location and path of your Digital ID certificate should already be specified, otherwise click browse and open to the location and path of your Digital ID file. - Click Next.
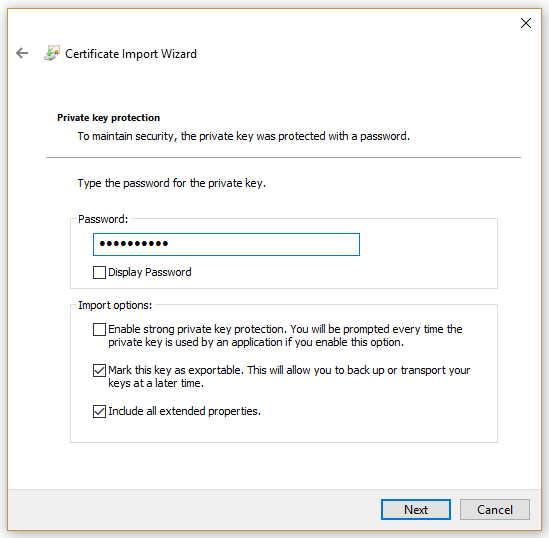
- In the Password field enter the password you specified for your Digital ID file.
Note: If you do not remember your password then you will have to start from scratch by re-exporting or regenerating a new Digital ID PFX/P12 file. - In the Import options: area check the box “Mark this key as exportable. This will allow you to back up or transport your keys at a later time.”
- Check the box “Include all extended properties.”
- Click Next.
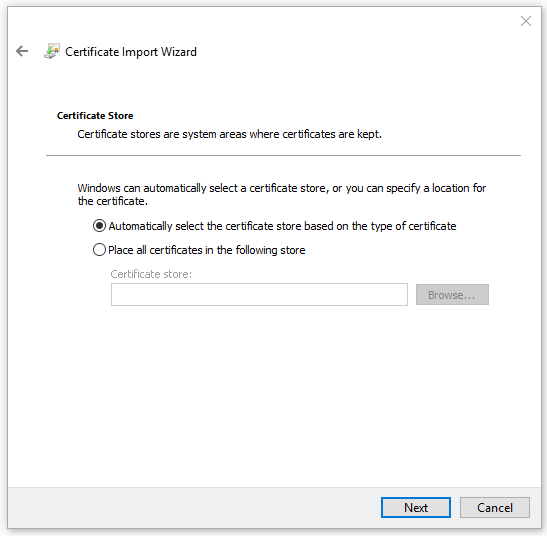
- In the Certificate Store page of the wizard, Click Next.
- Click Finish.
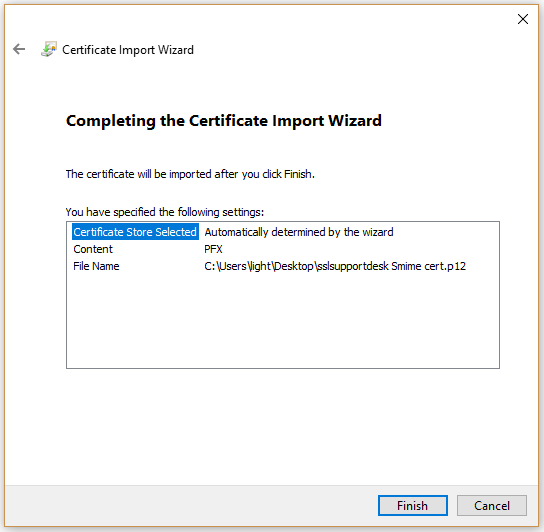
- You will get a message stating “The import was successful.”
Congrats you have just imported your Digital ID into your Windows system user trust store. You certificate should now be seen by digital signing applications that use this store.


