Microsoft Active Directory (AD) Lightweight Directory Access Protocol (LDAP) server system does not include an easy GUI method to create a CSR.
The following guide includes typical recommendations for you to successfully enroll and implement an SSL certificate pfx file needed for your AD LDAP. Applies To: Windows Server 2008, Windows Server 2008 R2, Windows Server 2012.
The typical procedure is as follows.
- Generate the CSR for your SSL certificate from one of the following methods.
- If you have a server system that has Windows Internet Information Services Manager IIS.
- Generate the CSR using Portecle Keypair creation and manipulation tool.
- After the SSL certificate has been issued you will have to install it and its intermediate back on the system or application you used to generate the CSR from step 1.
- Install your SSL certificate back into the Windows Internet Information Services Manager IIS.
- Install your SSL certficate using Portecle Keypair creation and manipulation tool.
- You will then Export and move the SSL Certificate with its private key as a .pfx off that system or application where your SSL certificate was installed.
- Now that you now have your .pfx file you will then move and import your SSL certificate .pfx into you AD-LDAP system from the steps below.
How to import your SSL .pfx certificate into your LDAP system:
On your LDAP system you will Open and create a MMC Snap-In.
- Start > run > MMC.

- Go into the Console Tab > File > Add/Remove Snap-in.

- Click on Add > Click on Certificates and click on Add.

- In the Certificates snap-in window select Service account.
- Click Next.

- In the Select Computer window select Local computer:the computer this console is running on).
- Click Next.

- In the Certificates snap-in window select Active Directory Domain Services.
- Click Finish.

- Back in the Add or Remove snap-ins window click OK.

- In the Certificates snap-in window, select Active Directory Domain Services and then, click Finish.
Note: If you do not see Active Directory Domain Services as a option you will have to contact Microsoft for support. Click here. - In the MMC Console expand Certificates – Service (Active Directory Domain Services).
- Right click on NTDS/Personal.
- Select Import.

- In the Certificate Import Wizard, click Next.
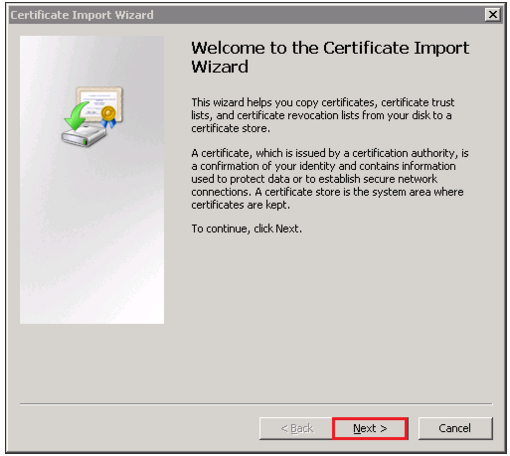
- On the File to Import page, click Browse.
- Specify the location and path of your SSL Certificate .pfx file, click Open.
Note: You may have to change the file type to all in order to find your .pfx file. - Click Next.

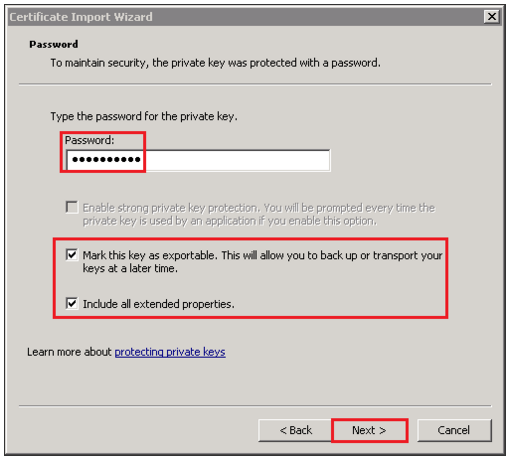
- On the password window specify the password that is associated with your .pfx file when you created it.
- Check Mark this key as exportable…
- Check Include all extended properties.
- Click Next.
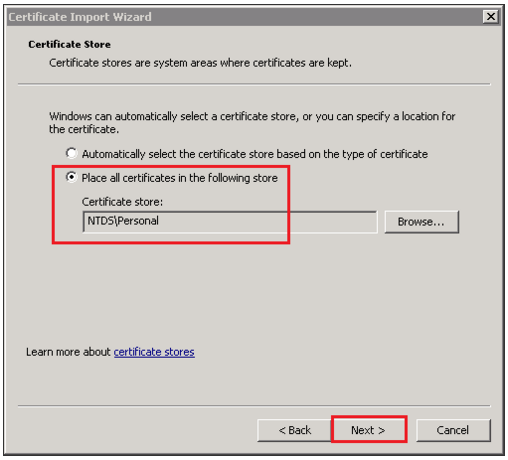
- On the Certificates Storage window leave the default selected and click Next.
- Click Finish.
Your client systems should now be configured to your Domain Controllers.
Verifying your SSL certificate is configured successfully:
- Open the LDP console by performing a search for “LDP” run as an admin.
- In the User Account Control window, click Yes to allow the program to make changes to the computer.
- In Ldp, click Connection > Connect.
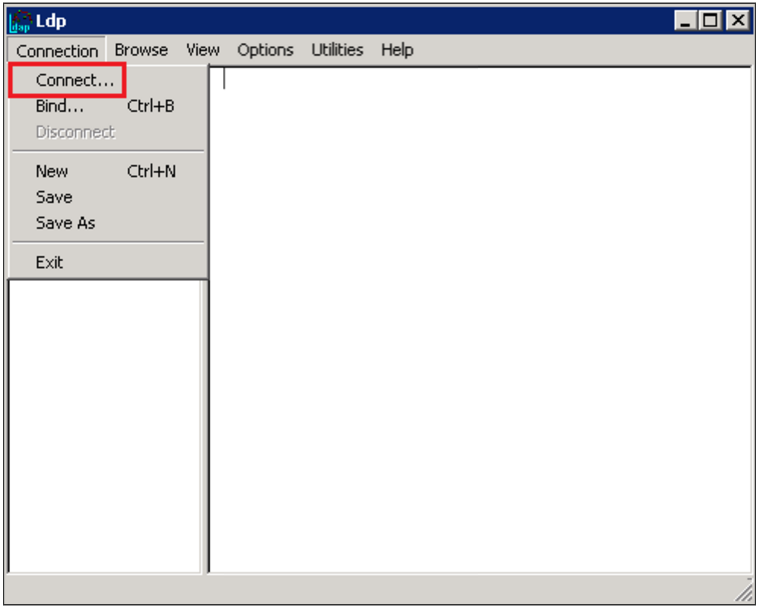
- In the Connect window specify the following.
- Server: The hostname you are wanting to connect to.
- Port: specify the port of the hostname you wich to connect (636).
- Check SSL.
- Uncheck Connectionless.
- Click OK.
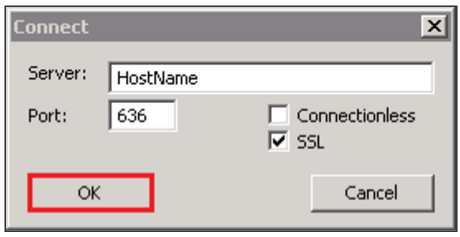
- You should receive a command output of the user name and the domain name for the binding.
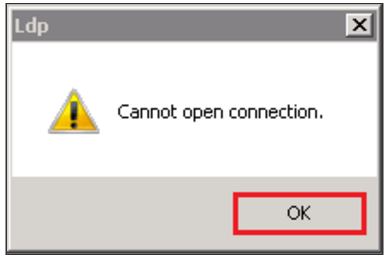
- If you receive a message stating Cannot open connection message, then this means LDAP-over-SSL binding is not configured properly.
- Click OK.
- Back in LDP window, click Connection > Bind.

- In the Bind window, click OK.
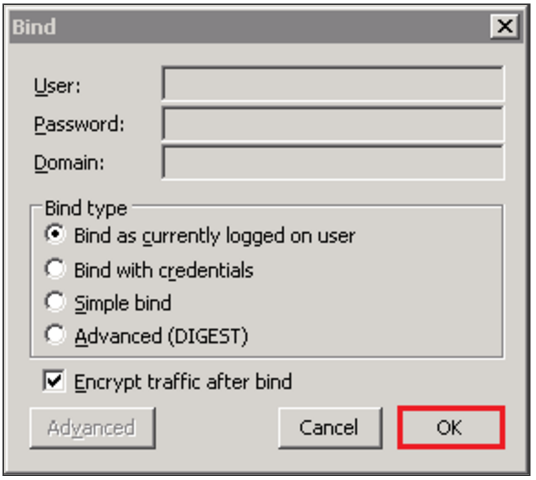
- The command output should display the user name and the domain name for the binding.
Your SSL certificate should now be installed on your LDAP system.
If you are unable to use these instructions for your server, Acmetek recommends that you contact either the vendor of your software or an organization that supports it.
Microsoft Support
For more information refer to Microsoft.


