Depending on your network you may have to move your SSL/TLS server certificate and its  private key from one system to another. This article covers how to convert and move your SSL certificate, its private key, and its intermediate CA from Apache a Microsoft IIS 8 Server 2012 System.
Apache systems are very customizable. The directory location and naming of the individual files needed vary depending on your personalized system. Below are generalized instructions.
We will start by assuming that you have already successfully installed the SSL certificate on the Apache web server.
To move your certificate keypair from Apache to IIS 8 Server 2012 perform the following:
Step 1: Finding your SSL Certificate, its Private key, and Intermediate CA file on Apache:
- Referencing the httpd.conf or ssl.conf file on the Apache system look for the location and directories of the three files necessary on the Apache system that has the installed SSL certificate.
- SSLCertificateFile /usr/local/ssl/crt/public.crt
SSLCertificateFile tells Apache how to find the the SSL certificate file. - SSLCertificateKeyFile /usr/local/ssl/private/private.key
SSLCertificateKeyFile tells Apache how to find the private key file.
- SSLCertificateChainFile /usr/local/ssl/crt/intermediate.crt
SSLCertificateChainFile or SSLCACertificateFile tells Apache the location of the Intermediate file.

- SSLCertificateFile /usr/local/ssl/crt/public.crt
- Once you have found the location of these files you can either move them to a single location somewhere in your drive or leave them in their current location and specify their locations in the command line when converting.
Step 2: Converting your Apache files into a Single PFX file:
- Convert the Apache certificate your sever certiifcate, its private key and chain intermediate files into a single PFX/PKCS#12 by performing the following OpenSSL command – change the file paths as appropriate:
openssl pkcs12 -export -in /path/to/ssl-cert.crt -inkey /path/to/private.key -certfile /path/to/intermediate-ca.crt -out cert-export.pfx
- The end result is that you will have a pfx file named cert-export.pfx
Congrats you have converted your SSL certificate from Apache to a pfx/pkcs#12.
Note: That pfx files are used heavily in Microsoft environments. If you are having difficulties converting a Server Certificate from Apache to pfx or are having trust issues after conversion of the Apache environment to .pfx, you may want to consider generating the certificate keypair in the natural environment used by pfx files. Use a Microsoft IIS system > Generate the keypair /Generate CSR > perform a reissue or get a certificate from your CA > perform installation of server certificate > export certificate as pfx file from that IIS system.
Step 3: Create an MMC Snap-in for Managing Certificates on the IIS 8 Server 2012 system:
- Start > run > MMC.

- Go into the Console Tab > File > Add/Remove Snap-in.

- Click on Add > Click on Certificates and click on Add.

- Choose Computer Account > Next.

- Choose Local Computer > Finish.
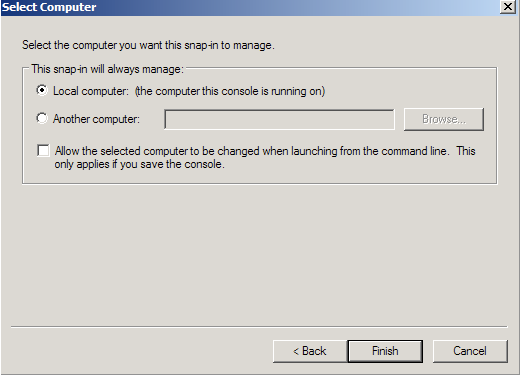
- Close the Add Standalone Snap-in window.
- Click on OK at the Add/Remove Snap-in window.
Step 4: Importing your converted .pfx file to IIS 8 Server 20012:
- In the Microsoft Management Console (MMC).
- On the left pane, click Certificates (Local Computer).
- Under Certificates, double-click Personal.
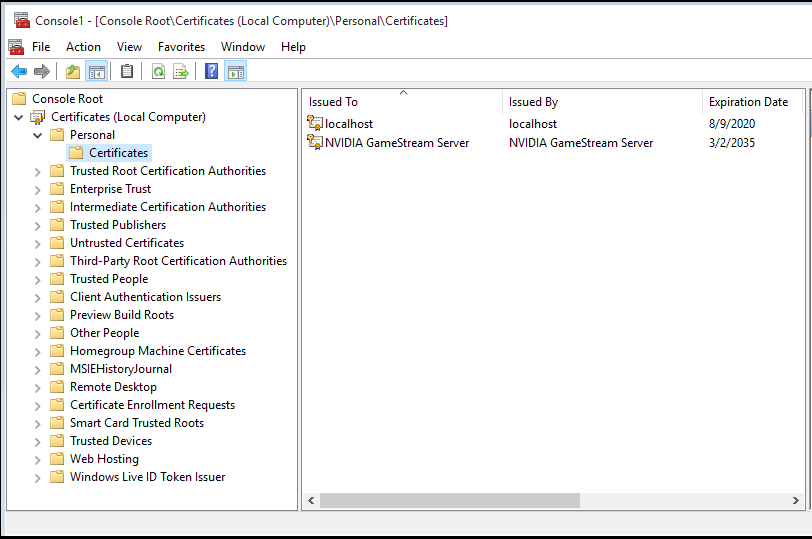
- Under Personal, right-click Certificates and select All Tasks > Import (this opens the Certificate Import Wizard). Click Next.
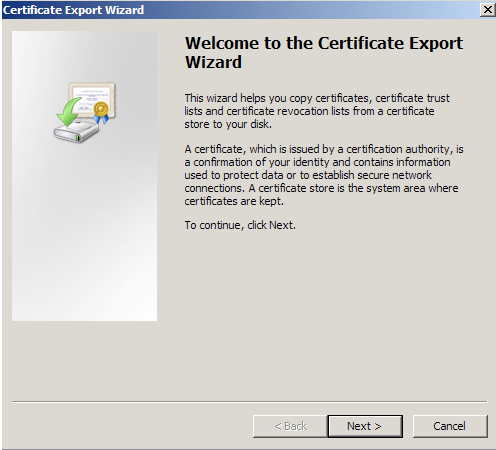
- Browse to the PKCS#12 (.pfx) file that you want to import and click Next.
Note: You may have to change the file type you are searching for in the browsing window to either pkcs#12 or All Files to find the pfx file in question - Enter the password used to secure the certificate for export and then click OK.
- To export the certificate again from this computer, select Mark the key as exportable.
- Select the option Automatically select the certificate store based on the type of certificate. (This ensures all the certificates in the certification path (Root, Intermediate, and Server) are stored in the proper place. Problems may occur if a certificate is placed in the wrong store.)
- Click Next.
- Click Finish. A message confirms successful import.
- Click OK.
You should now see your certificate under the Personal Certificates store in MMC.
Step 5: Assign and Bind the SSL certificate to your web site:
- Browse to your server name > Sites > Your SSL-based site.
- In the Actions pane, click Bindings.
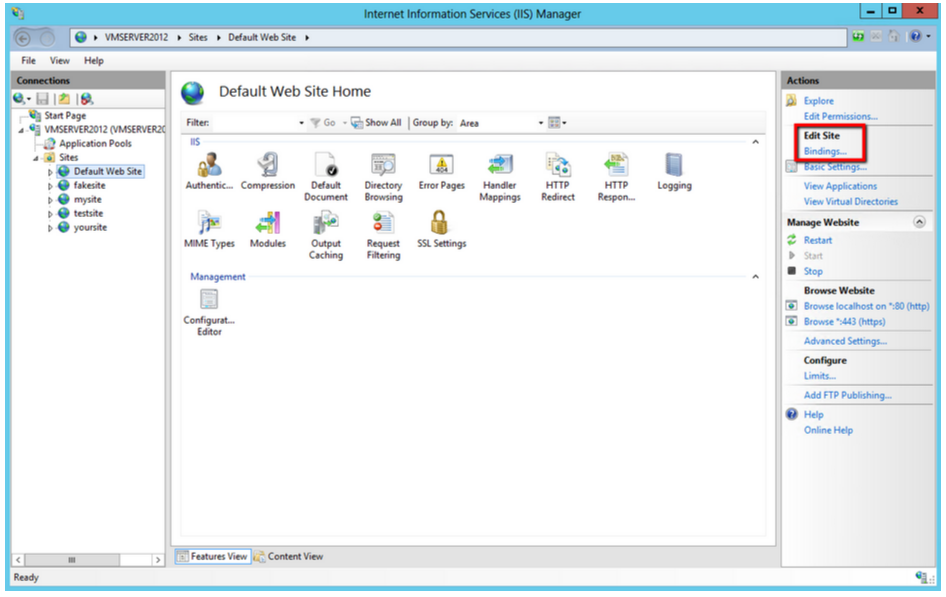
- In the Site Bindings window. If there is no existing https binding, choose Add and change Type from HTTP to HTTPS.
Note: If there is already a https binding, select it and click Edit.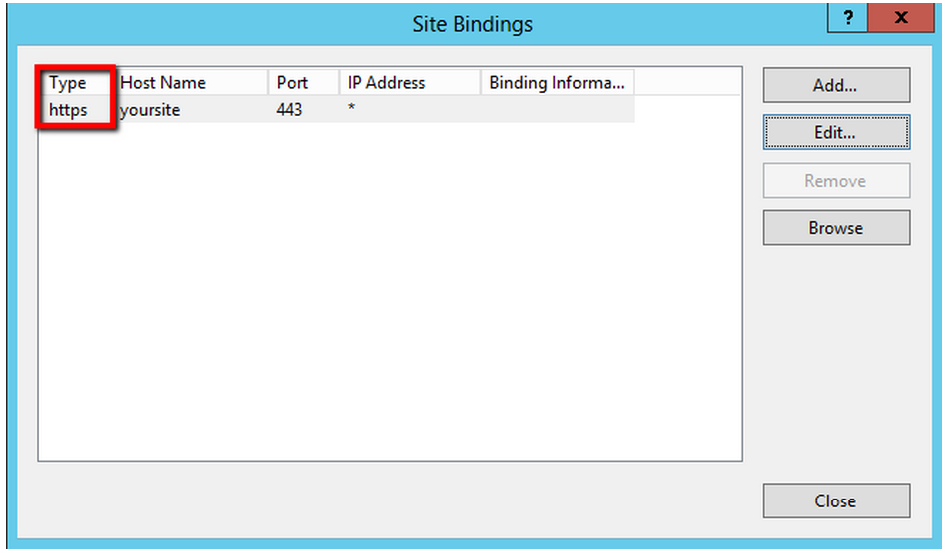
- From the SSL Certificate drop down, Select the Friendly Name for the SSL certificate that will be used for this site.
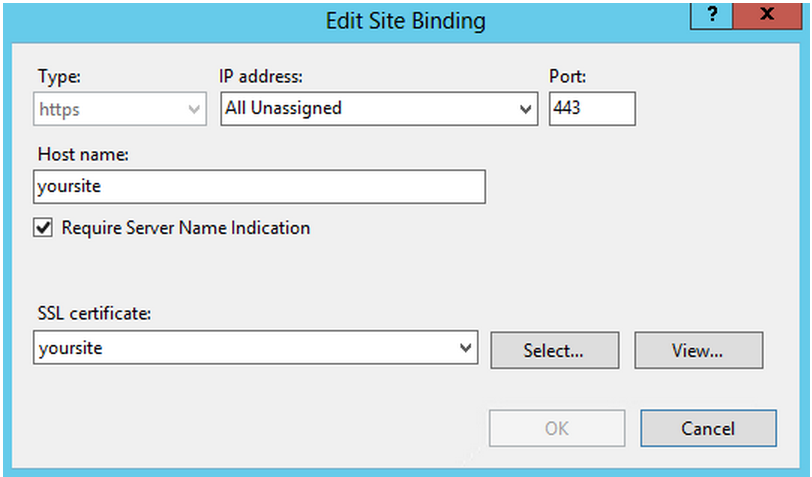
- Click Ok.
Your SSL Certificate is now installed, and the website is now configured.
Additional Notes:
If you do not specify an IP address when installing your SSL Certificate, the same ID will be used for all virtual servers created on the system.
If you are hosting multiple sites on a single server, you can specify that the ID only be used for a particular server IP address.
If you are unable to use these instructions for your server, Acmetek recommends that you contact either the vendor of your software or an organization that supports it.
Microsoft Support
For more information refer to Microsoft.


