Media Temple is one of the big players in web hosting. They host 1.5 million websites for 125,000 members. Their mission is “to help web developers, designers, digital entrepreneurs, and innovators bring their ideas to life online.”
Media Temple invented a unique clustered architecture of servers called “The grid,” designed to improve speed and uptime for shared hosting. The Grid also allows for quick setup and more effortless scalability — which is critical if your site takes off.
SSL installation in Media Temple
Prerequisites
- Private key
- Server certificate.
- Intermediate certificate.( in special cases)
STEPS:
- Log in to Media Temple
Log in to Media Temple and view your Account Center.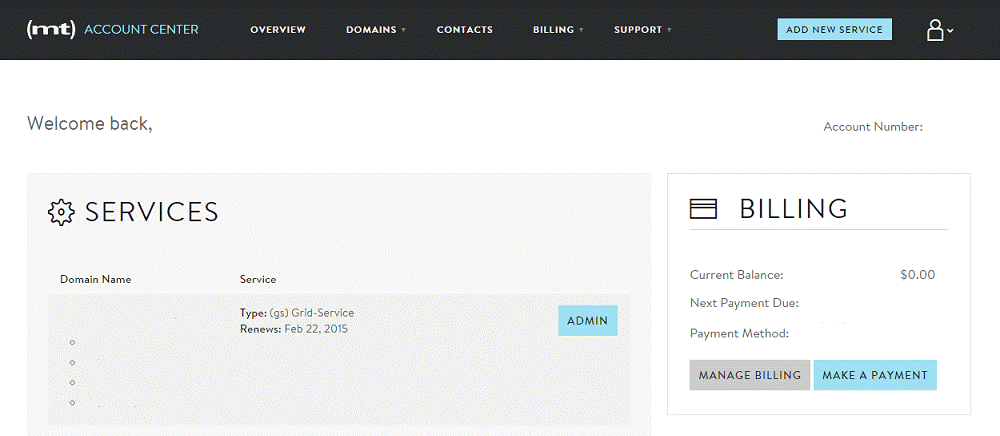
- Select your domain
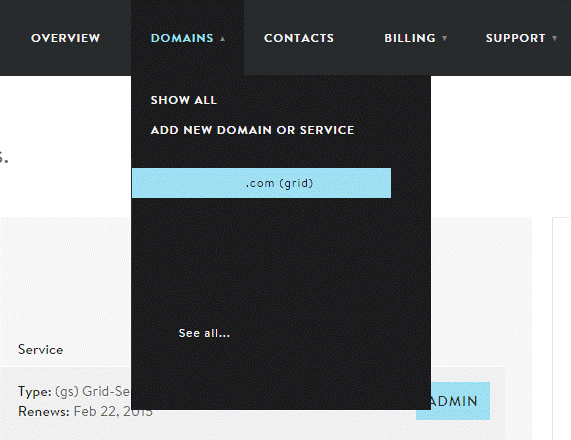
Click Domains in the navigation bar and select the appropriate domain name you would like to secure
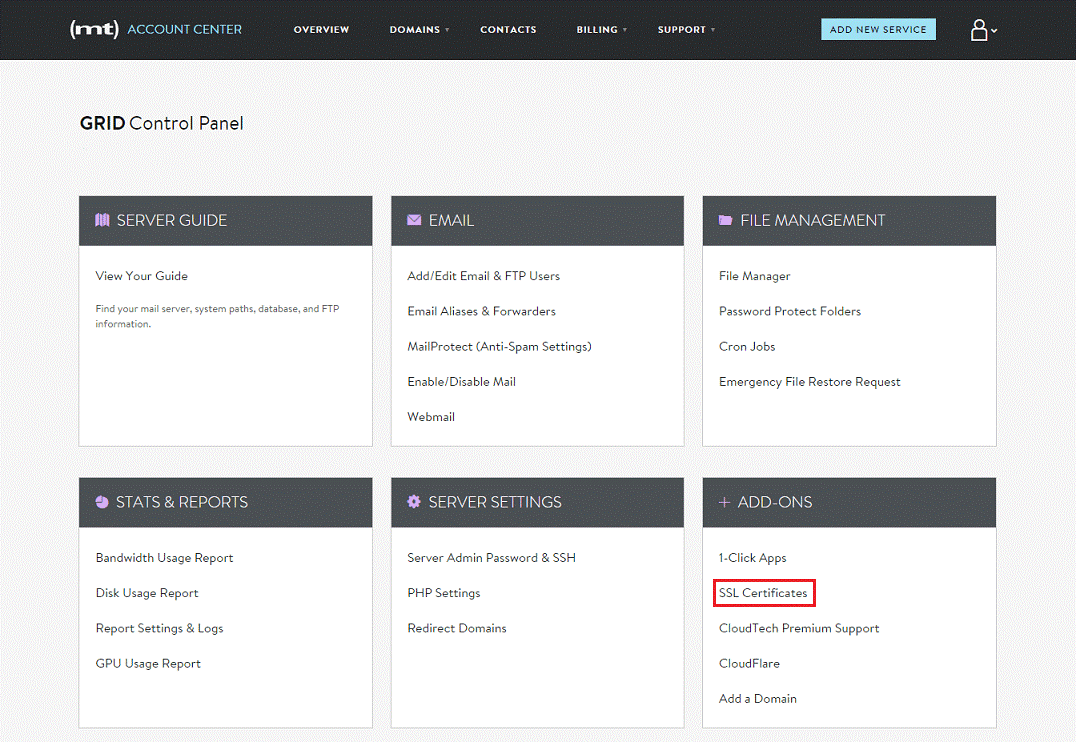
- View your GRIDAccess your GRID Control Panel.
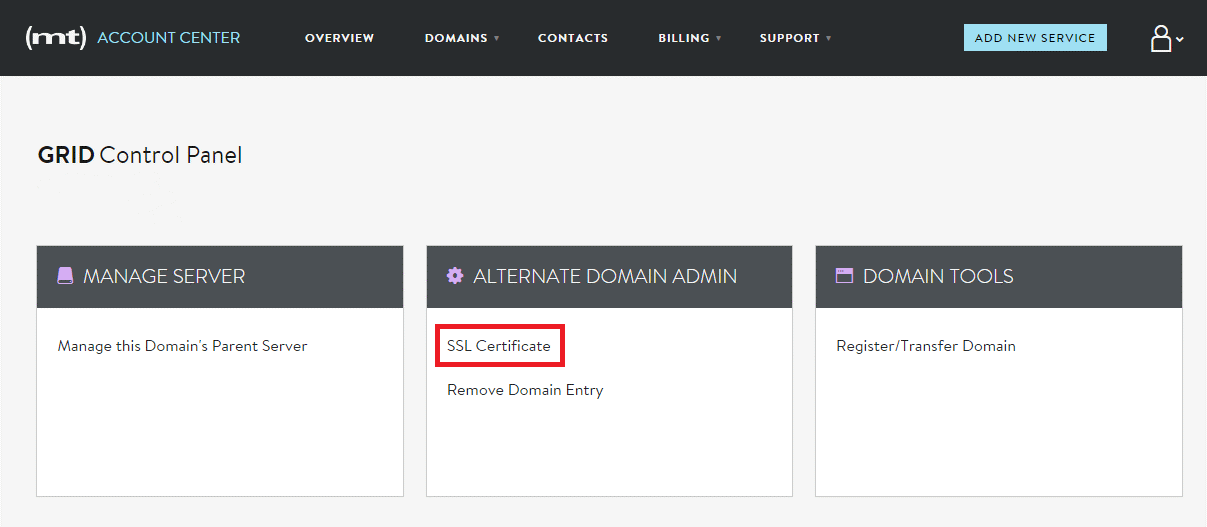
Note: The list of configuration options can vary depending on if you selected the “primary domain” under your account.- Choose “Primary Domain” or “Alternative Domain”
- For securing the Primary Domain, scroll domain to Add-Ons and select SSL Certificate.
- For securing alternative domains (meaning, not your Primary Domain), scroll domain to Alternative Domain Admin and select SSL Certificate.
- Import certificate
In the configuration page, click Import Certificate.

- Input your certificate files
Copy and paste your Certificate Files into the appropriate text box(s).
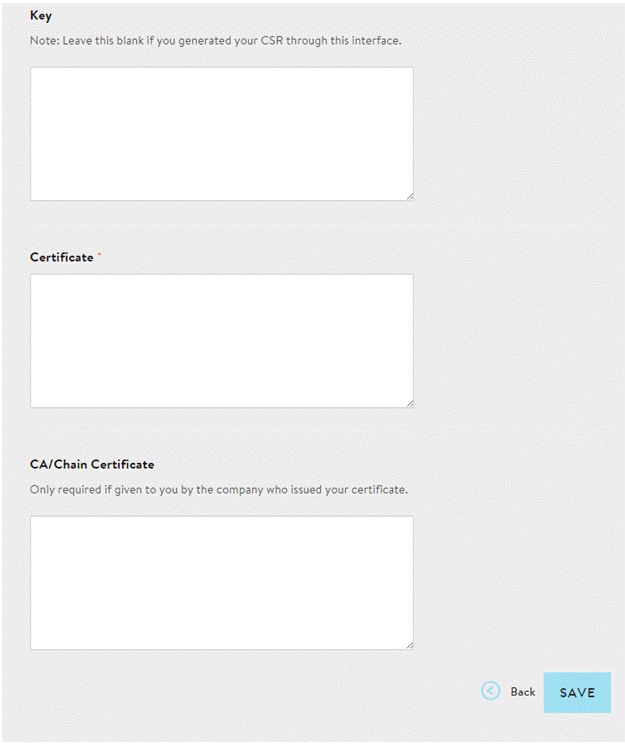
- Key – This is your private key that was created during the generation process. You may use the autofill option to fill the private key, only if the private key and csr was genereatd in the same media grid. If you have created the CSR and private key outside the media temple, then you have to manually copy paste the entire key file
- Certificate – This is your server certificate that was issued to your domain(s). Right click on the certificate file an select open with any text editor which will give you the following format
“—–BEGIN CERTIFICATE—–” and “END CERTIFICATE—–“. - CA/Chain Certificate – This is your intermediate certificates that allow browsers and devices to understand who issued your trusted certificate.Note: If you have multiple intermediate certificates, paste each of them one after another to create the correct certificate chain/path using a single notepad.
- Save your certificate files
Once you have inputted all of the certificate files into the appropriate boxes, click Save.
Note: It could take Media Temple up to 24 hours to finish configuring your SSL certificate on your live site. Please feel free to contact your host if this process takes longer than usual.
If you are unable to use these instructions for your server, Acmetek recommends that you contact either the vendor of your software or the organization that supports it.
If this article is helpful, please share it.


